Welcome back to Organizing Your Entire Home in 20 Days!
You have officially made it to day 14!
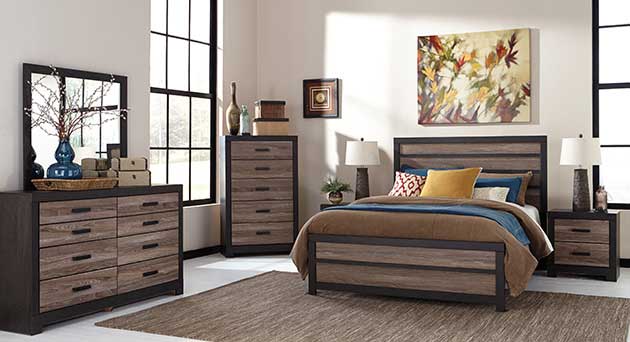
For today’s organizing, we’re going to focus on your bedroom!
Since we have already tackled the biggest clutter monster in your room (your clothes), today will be a breeze!
This is another great day to have your partner work alongside you to build an organizing system that works best for both of you, making the upkeep of today’s organization much easier going forward.
Every person will be different, but this is where you and your partner need to communicate about how you both feel about the clutter and how you will both put effort towards keeping up your organization!
This will not only make organization maintenance easier, but it will help your relationship with your partner!
The first step to organizing your bedroom is to pull out all of the items in the room and put them into a pile on the floor.
Bring out everything from the drawers, cabinets and off the shelves and start building that pile. This means everything!
As you pull things out, it’s efficient to categorize all of the items as you go.
This means grouping together all of the like items.
Make groups of all the books, hobby/extra curricular things, electronics, decorations, souvenirs, memorabilia, sport/workout gear and anything else you have stored away in your room.
The more specific and smaller you can make your groups, the better organized your room will be at the end of today’s process.
For example, if you have a “workout group” of items, then divide everything in it into individual groups of outdoor sports equipment, cardio equipment, and yoga equipment.
Another example would be a “books group,” those can then be further sorted by genre.
The same technique can be used for all of the broad groups you have categorized your items by.
Smaller categories will make your room easier to find things, quicker to put things away after use and overall better to function in.
By making groups of similar items, you will be able to easily see all of the items taking up residence in your bedroom and start thinking about which ones you could do without.
Remember this: you can’t organize clutter, so if you want your bedroom to truly be organized, you’re going to have to let go of some of the items that don’t use and things that don’t have special meaning to you.
This just looks stressful.
In order for this to happen, you have to go through all of the items in your room and make decisions about what you should keep and what you should get rid of, bringing everything out from it’s current spot in the room will help with that.
If your bedroom doubles as your office, check back soon for Day 15 when we organize the office and you can apply those same steps to the office equipment in your bedroom.
The next step to organizing your bedroom once you have categorized all of the items is to clean it!
Start by stripping the sheets and pillowcases from your bed, throwing them in the washer and replacing them with a fresh set.
Then, dust off high to reach places and wipe clean any other flat surfaces.
Take a moment and polish any knickknacks or decorations and wipe clean any mirrors or glass surfaces.
Don’t forget to disinfect commonly touched surfaces like light switches and doorknobs! After that, sweep/vacuum the floor.
Replace the trash bag in your trash can (if you don’t have one in your bedroom, you definitely should!). Finish up by lighting a candle to make the air smell as fresh as your room is about to be.
Cleaning and organizing work together to transform a room so you always want to take time to deep clean an area while you’re organizing it for best results.
It’s like when you have a new car — you’re more inclined to take care of it when it’s fresh and new!
Once you have cleaned your bedroom, it’s time to get back to all of that stuff. There are only 3 options to all of these items: keep, donate or trash.
Items that you want to keep should be things that serve a purpose for you and will definitely be used in the future.
These are things like books, office supplies, electronics, memorabilia, and current decorations.
Items that need to be donated are things that are still in good condition but no longer serve a purpose for you.
These are things like old decorations, hobbies that you no longer enjoy, items that you have an excess of and items that you haven’t used in at least 6 months.
Items that are trash are things that don’t serve you any further purpose and wouldn’t serve anyone else purpose either.
These are going to be things like expired batteries, broken electronics, chargers that don’t have a host or any other items that are broken or useless.
It’s easy to let stuff pile up during your day to day routine, so take time to clear those things out of the way.
If you are having difficulty deciding on what items should be kept or donated, ask yourself questions such as, when was the last time someone in my family used/wore this item? Does this item still serve its original purpose for me? How many of this one item do I have and is more than one really necessary? Would someone else better benefit from having this item than I would?
By asking yourself these questions about items you aren’t sure of, you are opening your mind and being honest with yourself about the needs of your family. Any items that you keep but you don’t need will continue to add to the clutter around your house for no reason.
By giving away these items, you are not only clearing the mess from your house, you are also allowing someone else to use these items that may need them more than you.
Once you have made the decisions on what you will be keeping and getting rid of, it’s time to put the items you’ll be keeping away.
Put everything away within the categories that you previously sorted them by.
Start by putting back all the books on their shelves by genre.
Once that is done, put away any of your hobby or extracurricular activity items.
If you have a lot of memorabilia items, store them neatly in a clear container and keep it in a less commonly used spot in the room.
You can also get cute “photo” boxes to store these items.
Place commonly used items in easy to reach places like on top of your dresser or nightstand, invest in a cute tray to keep everything contained and looking neat.
Put less commonly used items in drawers so they are tucked away and not adding unnecessary clutter to your room.
For the remaining items from your categorization step and other miscellaneous things, use cute baskets and labels to store everything out of site, then place them on shelves to keep the room looking tidy.
Finish up by displaying decorations and small knickknack items in the areas of your room that look empty.
By filling empty surfaces with decorations, you will be less compelled to start stacking clutter there.
They can house all kinds of different items and decorations that you keep in your room, while keeping everything in a designated spot and looking organized.
You can even get fabric cube inserts to keep the space looking even more tidy!
After you have put all of your items away, the last step to organizing your bedroom is to deal with all of the leftover items that are still in the pile on your floor.
These are the items that were in your room at the beginning of today but don’t actually belong there.
Take the time now to place those items where they actually do belong.
To prevent random stuff from ending up back in your room going forward, try to avoid bringing those items in in the first place or set rules for yourself to when those items need to be returned to their designated spot.
Out of all the rooms in your home, your bedroom should be the most peaceful and relaxing place to be in.
This is the place where you should be able to let your guard down and recharge. The lack of organization and clutter should be the last thing you should have to worry about when you’re there.
If you don’t feel this way while in your bedroom and would like help getting there, please reach out to the Clutterless Home Solutions Team.
Talk soon,
Clutterless Home Solutions


