Hello, friends! Welcome to Day 5 of Organizing Your Entire Home in 20 Days!
We are going to keep working in your kitchen and organize your pantry today!
Just like the other areas in your kitchen (Day’s 3 & 4 can be read here), the pantry is visited often throughout the day by many different people. Therefore, the functionality and design of your pantry is so important to ensure your kitchen stays organized. Let’s get started!
The first step in today’s process is to bring out all of the items in the pantry. Bring out all of the food, paper ware, utensils, reusable shopping bags, beverages and anything else that you keep in your pantry.
Keep pulling out all of the items until there is nothing left there. By pulling out all of the items from the pantry, you will be able to clearly see what items you are working with.
After you have brought all of the items out from the pantry, categorize everything into groups based on the different types of food groups.
Group together the pastas, sauces, grains, chips, baking ingredients, back stock items, breakfast items, breads, beverages, and cooking utensils, until all of the items in the pantry are in a group with similar items.
Grouping together all of the items based on categories will help find the right “homes” for all of the different food you keep in your pantry.
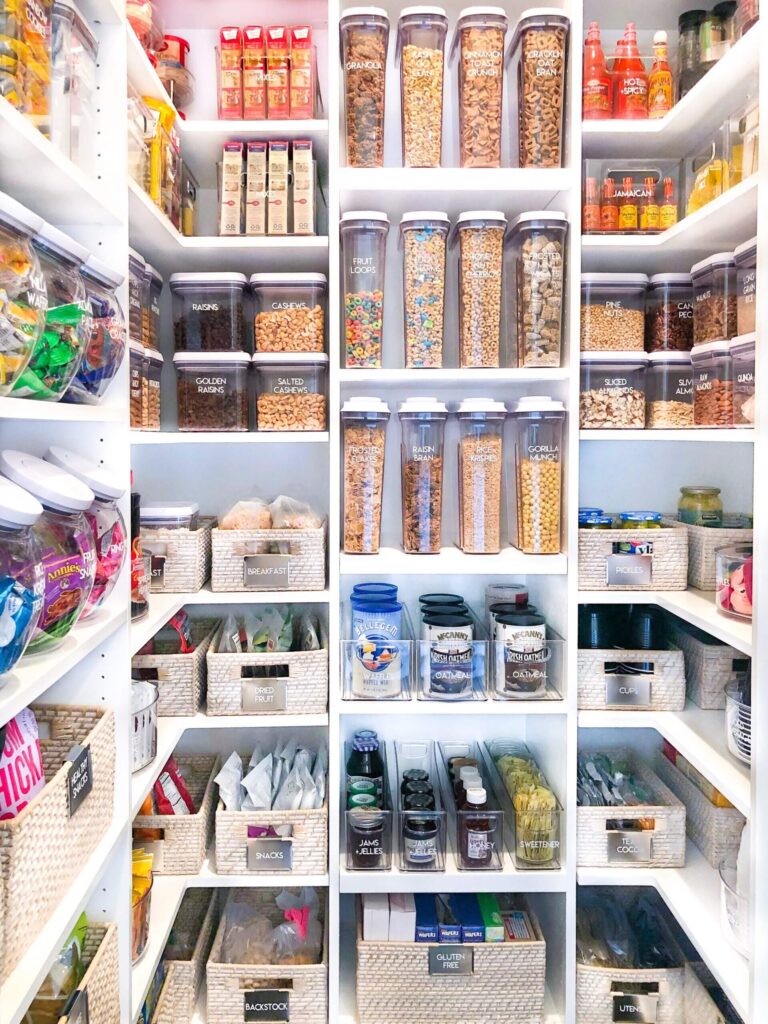
Check out the picture below if you need some extra help figuring out how to categorize your food.
While you are grouping together the items, check expiration dates on all of the food and throw anything away that has expired. Also be on the lookout for empty boxes or old food containers to throw away.
The next step to organizing the pantry is making decisions on whether you will be keeping, donating, or trashing the items.
The decisions for items from the pantry aren’t as intense but still be honest with yourself about the needs of your family and which items you could part ways with.
Things you want to keep are food items that is still within the expiration date, food that your family will be eating, and utensils that your family will be using.
Items that you want to donate are going to be nonperishable items that your family will not eat and kitchen utensils your family no longer uses. For example, the last time I decluttered my pantry, I donated my snow cone maker that I bought impulsively and only ever used once.
Items that you should trash are food items that have expired and any kitchen utensils that are broken.
Once you have categorized all of the items from your pantry and made decisions on what you’ll be keeping, it’s time to clean it!
Wipe down all of the shelves, clean the inside any baskets or bins, wipe any bottles or glasses that are stored in the pantry and vacuum/sweep the floor.
Once the pantry is cleaned, its time to put all the items in containers based on the categories that you previously grouped them together in.
You may be asking yourself “Do I have to use containers and bins?”
To ensure your pantry stays organized, the best strategy is to contain the item so everything doesn’t get scattered around. Containment gives “homes” to all of the food items so everything is easy to find and easy to put away.
So the answer to that question is solely dependent on you. I do highly recommend it for the best long term results, however, build an organization system that is best for you and your family.
My favorite product to use in pantries (and refrigerators!) to contain items are these acrylic bins from Target.
They come in an assortment of sizes for all of the different food items, they are clear so you can see what items are being stored in them, and they look uniform so your pantry not only functions well, but also looks great.
When placing the items back into your pantry, make sure items your children grab on their own (snacks, breakfast foods, beverages), are on the lower shelves so they are easy to reach for your kids.
Place any larger kitchen utensils that are not commonly used (air fryer, snow cone maker) and back stock items (extra ketchup’s, salad dressings, oils) on higher shelves since you will not be reaching for those frequently.
Then, place the rest of the food items in between those shelves.
For hard to reach corners, use Lazy Susan’s to keep all of your cooking items easily accessible.
Another easy way to tidy up your pantry is to hang hooks along the inside of the pantry door to keep your reusable shopping bags and lunch bags organized.
Here are a few of our favorite pantry projects!
Don’t forget to label any bins you used so your family will know where to place things in the newly organized pantry!
For any items that are leftover (because they didn’t actually belong in the pantry), now is the time to take those items back to where they really belong.
To ensure your pantry doesn’t become messy again, talk with your family about the new organization system so everyone is aware of the new changes you made.
You want your family’s pantry to be a well organized space so gathering ingredients and making meals isn’t a chore.
With these tips, your pantry will become an easy to use area. If you’re still feeling overwhelmed with the process, please reach out to the Clutterless Home Solutions Team.
Talk soon,
Clutterless Home Solutions


