Ever look around your house and know it could be better? Like you really want to spruce up the rooms in your home and organize all the chaos?
Maybe you’ve tried to declutter your pantry or your closet and stopped halfway through because it started to get too overwhelming and it was time to start dinner anyway.
If we’re being honest, cleaning up clutter is the last thing most people want to be doing when we have a day off and are trying to recharge from the week.
But then when you’re sitting in your living room trying to finish up your favorite series, you can’t help but notice how your children’s toys always end up scattered around and why is there a never ending stack of papers on your kitchen table?
You ask yourself… where would you even begin or what’s even the point when it’s just going to get messy again?
For the next few weeks, we’re going to work our way through your home, organizing every single room in your house.
No worries though, follow along with us and we will give you step-by-step instructions on decluttering the entire mess away!
During this entire process, no matter what space you’re working in, there are 7 main steps you will always follow. You can read about the steps in detail in our Blog, How to Organize any Area of your Home (The Ultimate Guide)!
These 7 steps will not only help you tidy up the space, but also build a lasting organization system that you will easily be able to follow moving forward.
Building an organization system is important because it ensures that you don’t have to keep cleaning up the same mess over and over — it helps you and your family be able to easily and quickly put things away as you use them. We talk about the importance of our “Organizational Foundation” here.
The 7 steps are: take everything out of your area, categorize your items and get rid of trash, purge and declutter unused items, gather containers for your kept items, utilizing your bins/baskets and labeling them, storing like baskets in groups, and making adjustments for your own personal system. Follow these 7 steps for 20 days and your entire house will get organized!
A few tips to remember along the way:
* The most important thing to remember is to start with one space at a time. This is why we will only be focusing on one room a day. Organizing can be overwhelming, so starting small is the best thing to do!
* Every home and person is different, so think of this plan as a road map. You can do one day at a time or combine the days together. If one of the days has a room that isn’t in your house, use that day as a resting period. Go at a pace you feel comfortable!
* We want to be clear: decluttering is NOT moving items from one room to another. If you do this, you will continue to have clutter. Use these steps to find real “homes” for items and get rid of items that you don’t ever use.
* Remember that organization is about efficiency first! It’s great to have a Pinterest worthy pantry, but all that matters at the end of the day is you can find what you’re looking for when you need it. Build an organization system that values functionality over looking good and it will work better (and last longer!) for you and your family in the long run.
* You cannot organize clutter. You can tidy it up, but then you will do that a hundred more times in your life over and over again. Let’s build a lasting organizing system, not just clean up a mess.
Here’s the overview of what each day will look like, check back here in the next few weeks to go in detail for each room, lets get started!
Day 1: Entryway
This is the first place people see when they enter your home, and it’s usually the zone where everything gets dumped (purses, shoes, sports gear, backpacks!).
On the first day, we will go through your entryway (or mudroom!) and organize the first mess you see when you walk inside.
Items like mail, keys, backpacks and items that need to be returned to the store, are all things that need to be left in the entryway. Have a dedicated spot for mail that was just delivered and mail that you need to send out.
Try to keep this space as minimalistic as possible — your entryway is like the first impression to the rest of your house, so make a good first impression!
One thing we stress to our clients is to make sure you’re only keeping things you and your family use daily in this space. It’s not the dumping ground for every pair of shoes you own!
Having a space and a system for every area of your home will not only help you stay organized, but it will also help your family help YOU (because we know it’s mostly them already, right?)
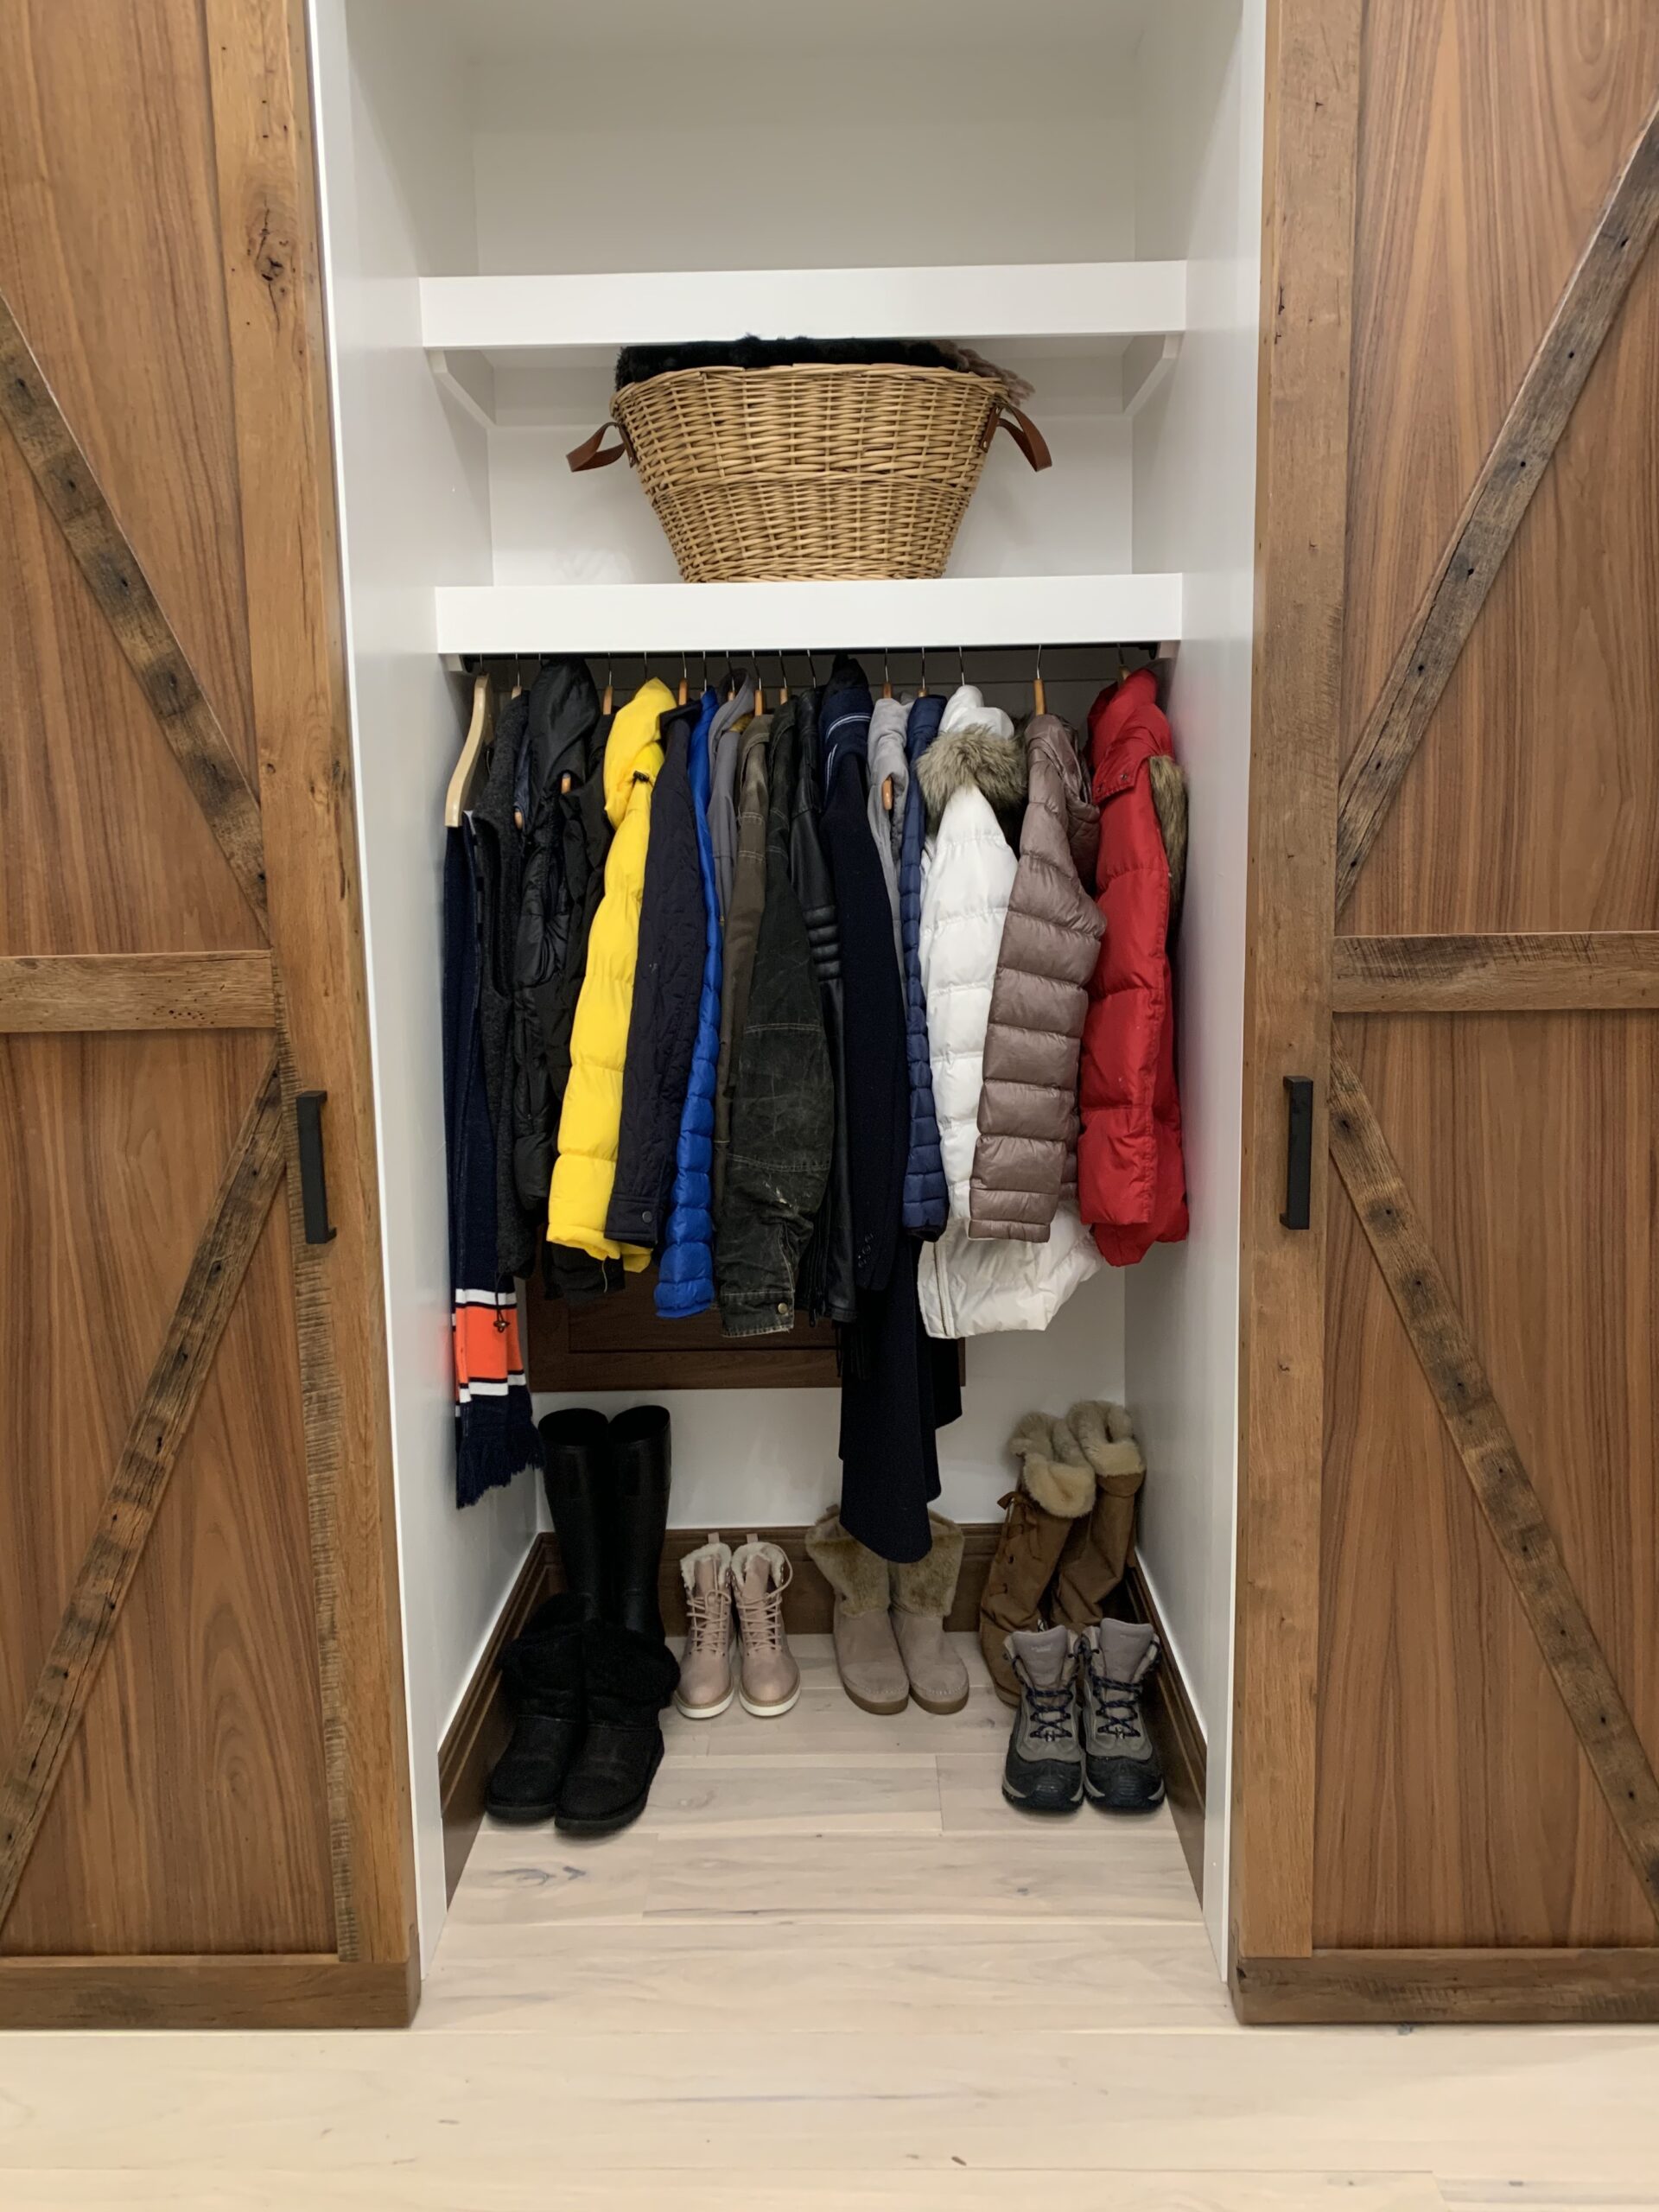
Day 2: Coat Closet
The coat closet can become cluttered strictly because there are SO MANY different kinds of coats. Rain coats, parkas, event coats, pea coats, light jackets, hoodies, and more!
Then there’s boots, scarves, hats, mittens, backpacks and everything else that gets shoved to the back of this space! On this day, we will go sort through this dreaded closet so it stays looking tidy.
We like to keep our gloves, scarves and hats in baskets, and keep our different types of coats categorized to make it easier to navigate this space — we will go more into this area in Day 2!
*The kitchen is a big project so we will split it up into the next three days so you won’t feel overwhelmed while working through it.
Day 3: Kitchen Drawers and Cabinets
Drawers and cabinets can easily become messy when the entire family is moving through them at all times during the day. Drawer organizers are going to be your best friend here. Get ready because we’ll have even more tips and tools for you to check out on this post!
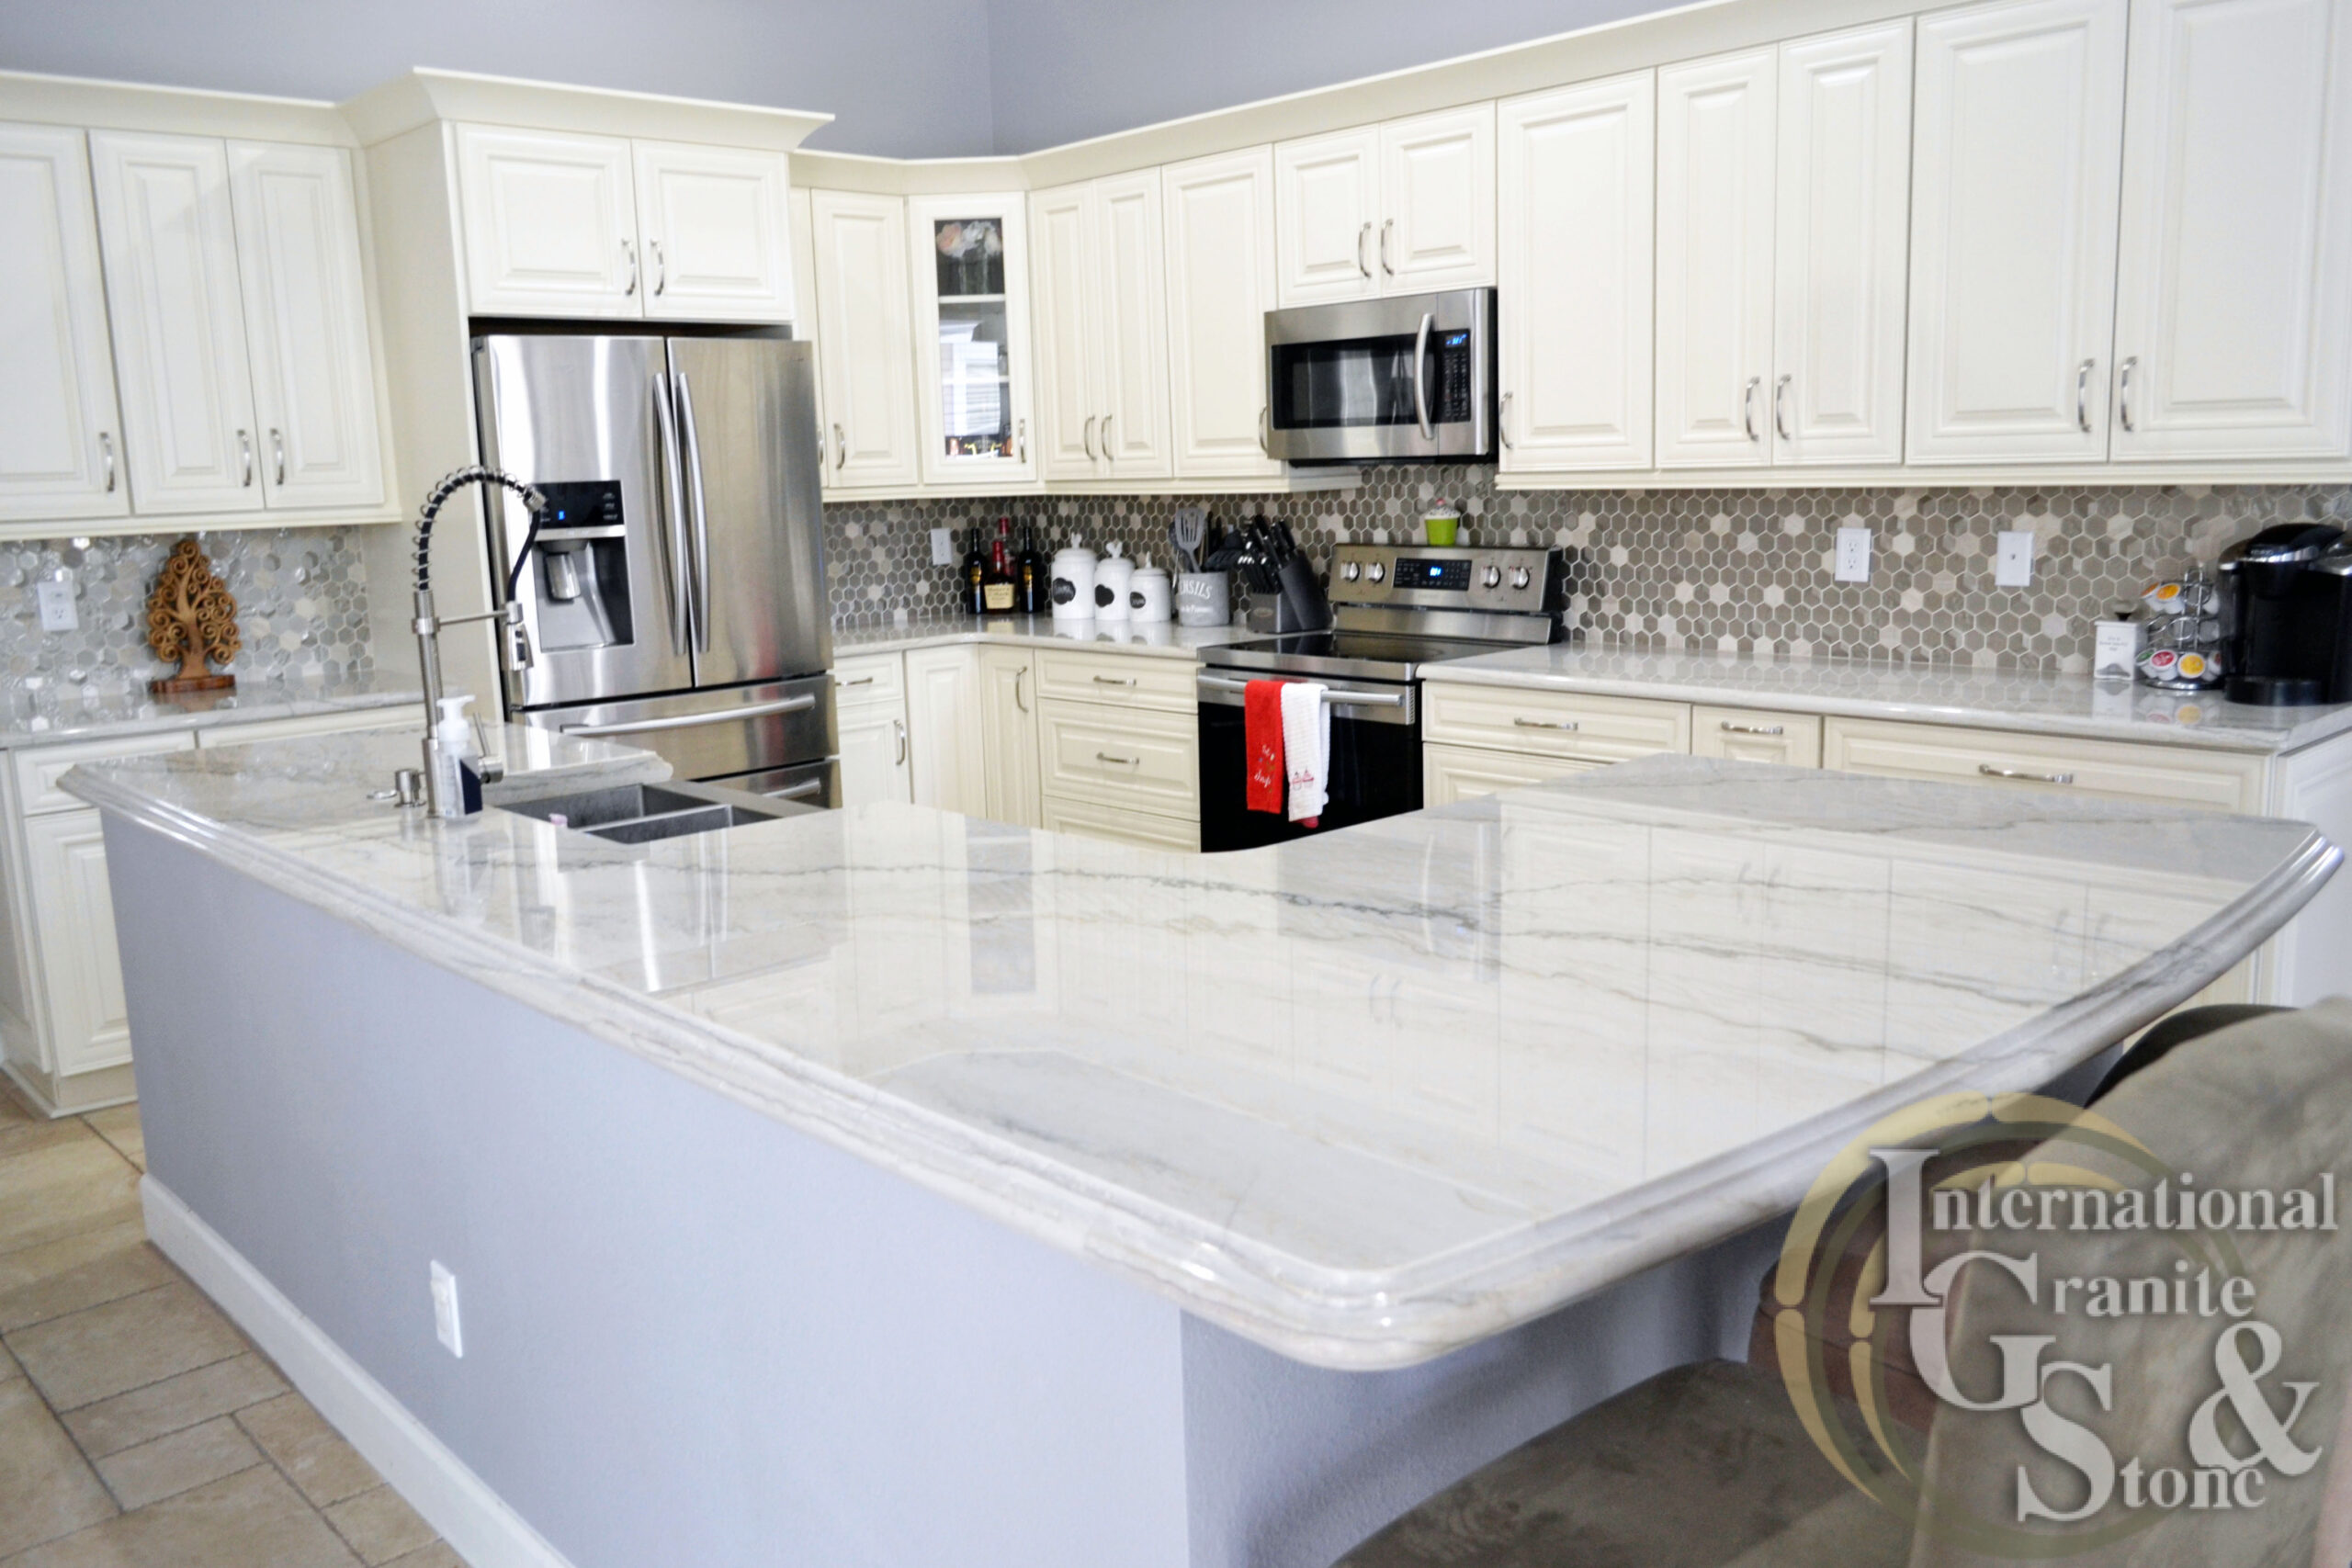
Day 4: Kitchen Counter Tops
The counter tops in your house can sometimes be the worst clutter dump zones.
Just like your kitchen drawer and cabinets, counter tops bear the brunt of the chaos that ensues from your families regular use.
One way to combat the clutter here is to designate a space in your cabinets for as many appliances as possible.
We also like to put decor, something like a basket of apples on the counter (this is good for healthy eating habits as well — it’s been proven that people with healthy snacks in plain view are overall healthier!)
On day 4, we will work through this space so you can actually see your counter tops during the day!
Day 5: Kitchen Pantry
The most dreaded room in the house (in my opinion!) to look into is the pantry. This little space can cause so much stress.
Pantry’s are constantly getting messy because of constant trips to the grocery store and it’s oh so easy to shut the door and pretend like everything is fine. Everything is not fine!
The satisfying thing about a pantry is that it can look and feel so much better after it’s been organized.
One way to keep things organized in the pantry is to categorize the foods you have. For example, I like to separate salty snacks and sweet snacks, a section for baking supplies, and a section for grains like pasta and rice. We will go into this in more detail in our blog post on organizing the pantry!
Day 5 dives deep into your pantry so you can open the door and not have boxes and cans falling on you.
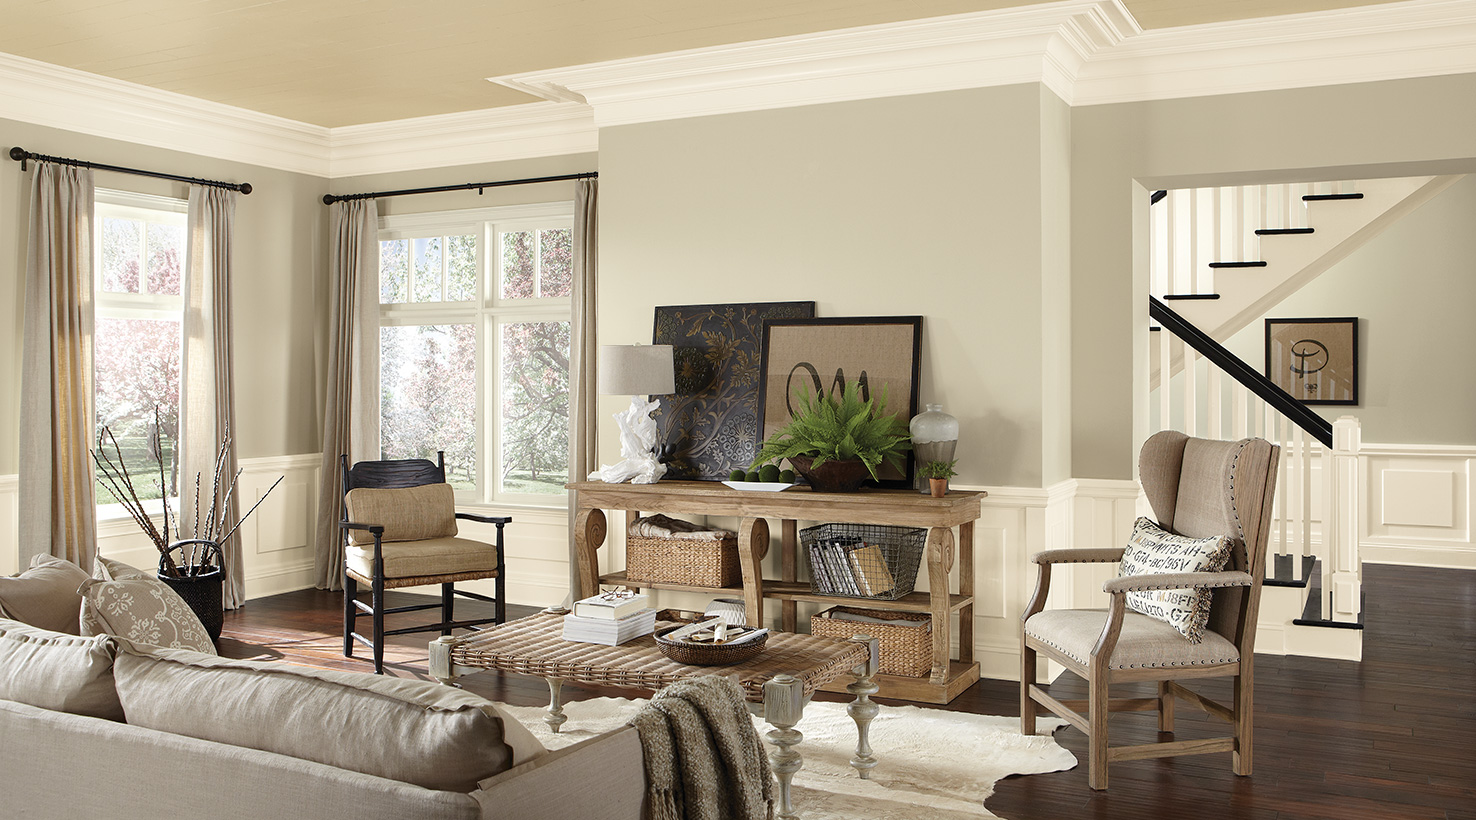
Day 6: Living Room
Your living room is the main gathering place in the house for your family. This is where your family spends most of their time together hence, where a lot of clutter accumulation occurs.
It’s important to make it a priority every night to spend a few minutes to pickup this space. The living room is one the place where everyone congregates at the end of the day, and it’s easy to leave it messy.
On Day 6 we spend time here, focusing on four main zones so it’s easy to work through and easy to keep organized your organizing overhaul.
Day 7: Dining Room
Day 7 will focus on your dining room! Like your living room, a lot of family activity happens here which can bring a lot of mess.
On this day, we will focus on going through old dishes, seasonal items and clearing off your dining room table.
It’s easy to hold onto these kinds of things (china and other plates and dishes in your dining room hutch) because they often sit unused.
Similar to the kitchen counters, having items already set on your table, you will be less likely to leave items like old mail or lunch boxes sitting on the table since that space is already being taken up.
We will have more tips and tricks for you during this day, so get ready!
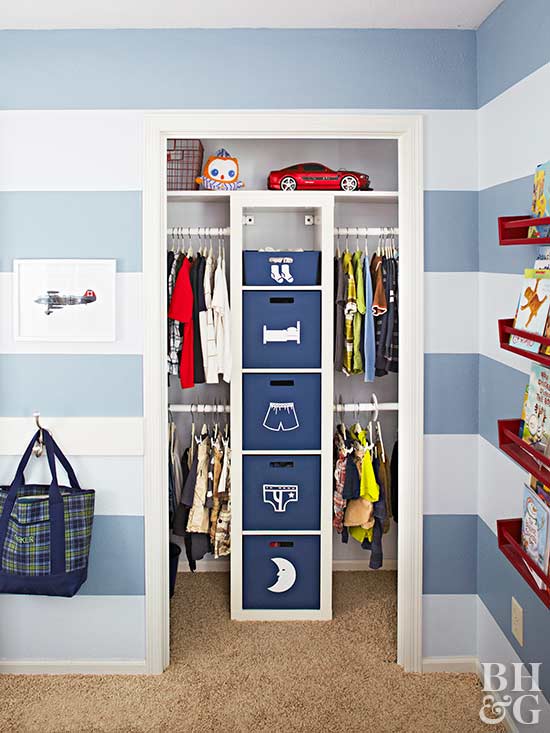
Day 8: Kids Dresser and Closet
On this day we will be going through your children’s dresser and closet. Enlist them for help and start building their organizing skills along with yours.
If you have more than one child, do all of their clothing today or split up each child for a separate day, whichever works best for you as long as it all gets done!
If you plan on re-using your kid’s clothes, you can store the hand me downs in bins by size to keep them easily accessible.
Bonus Tip:* When making the final decisions about clothing, remember that you can use old beloved clothes as decor like framing their favorite T-Shirt or you can cut them up to make a blanket.
Day 9: Kids Toys
Day 9 will be focused on your children’s toys, so definitely make sure they are there to help you!
In order for your children’s toys to stay organized after this day, you’ll have to purge old toys they no longer use, so make sure you prepare your children for this going in.
Remember also that your kids may want to keep everything. This is the best time to figure out what toys are most important to them, because anything they’re not playing with should be donated or consigned so another child can enjoy it!
The most important thing to remember is that kids are great at organizing, because they are still building good habits! If you come up with a system that’s easy for them to follow, and hold them to cleaning up their toys, they’ll do the job for you!
Day 10: Kids Bathroom
Another day for the kids! After you have gone through their clothing and toys, we’re going to finish up the children’s segment by organizing their bathroom.
This space can get messy because (at least for little girls!) there can be a lot of fun hair-ties and small accessories to keep in order.
Small drawer organizers work well for these small items!
Day 11: Guest Room and Bathroom
Whoa two rooms in one day? You read that right!
On Day 11 we will tackle both the guest bedroom and bathroom.
If you’re anything like me, this room is mainly used for storage so get ready to go through some old boxes!
Always remember to ask yourself: Are these items being used? Do I have multiple pairs of guest sheets or towels? Do you have another space to store memorabilia that doesn’t take up space in your guest room?
Day 12: Master Dresser and Closet
This one’s going to be a fun one!
Get ready to sort through all of your clothing, shoes and accessories! We will spend time purging old items and creating an organizational system that works best for you.
Contrary to the Marie Kondo method, we don’t suggest you put all your clothes in a pile on the bed. The best thing we’ve found is to put together all like items to decide what to purge in each category. If you see all the blue dresses you have in one spot, you’re more likely to know which ones you really want to keep.
Day 13: Bathroom
Get ready for a fun day of work! We’re going to spend time going through hygiene products, makeup, hair products, face care and paper supplies.
We’re going to dive deep into those bathroom drawers and cabinets to leave your bathroom looking amazing.
This space can house a ton of unused products (can we say impulse buy?). It’s best to keep your daily products on the counter (keep this as minimalistic as possible!), and store the back-up or larger products in the closet or under the sink in labeled bins or drawers.
Day 14: Your Bedroom
After we have worked through your clothing and bathroom, we’re going to focus on your bedroom. We’re going to sort through the drawers, bins and cabinets to declutter your room.
Once again we remember that using up your counters and open space with decor instead of clutter can make it easier to keep this space looking clear.
An important thing to remember on this day is you can’t organize clutter so get ready to part ways with some old things!
If your bedroom doubles as your office, skip this day and complete day 14 and 15 together (or continue with this guide and split your bedroom into two days, remember this is all about doing it in the best way for you!).
Day 15: Office
Day 15 we’re going to organize your entire office! We will work through all areas but focus on going through old papers.
Lots of people have multiple filing drawers for all the paper clutter they’ve accumulated over the years.
A few rules to live by when purging your paper: keep your taxes for 7 years, bills for 6 months and bank statements for a year!
If you really want to go crazy, make sure to test all your pens and trash all your pencils without working erasers.
This day will have plenty of tips to ensure your office stays looking nice.
Day 16: Laundry Room
Oh the dreaded laundry room! Growing up, cleaning the laundry room was always my least favorite chore but today we will make it a fun one!
We’re going to spend time deep cleaning this room and organizing the miscellaneous items that find their way here.
This is often the space that houses overflow houses supplies in the extra cabinets, so make sure to keep these things categorized so they’re easy to access when a lightbulb goes out or your need to replace a smoke detector battery.
If your laundry room doubles as your linen closet, skip this day and complete day 16 and 17 together (or continue with this guide and split it into two days, remember this is all about doing it in the best way for you!).
Day 17: Linen Closet
For this day, we’re going to purge through old sheets and blankets so get ready to part ways with some things!
After we purge a few items, we will focus on how to fold linens so they stay looking neat while they’re not in use. (Here is a video on folding some common items in your home for a more in-depth look at what we mean and how to fold!)
One way we like to keep this space looking nice is to keep what we call the “fat fold” facing out. This means that you want the largest fold of the sheet or towel facing out in order to create an aesthetic appeal in the closet. You can see it in the closet below!
Day 18: Cleaning Supplies
For Day 18 we’re going to get your cleaning supplies ready for spring cleaning season.
One easy way to cut down on the space cleaning supplies is to consolidate bottles of same cleaning supplies into one!
We’re going to sort through cleaning supplies, check expiration dates and organize them. Get ready!
Day 19: Garage
The garage day will be a great time for a little family bonding over a fun project!
This is a space that holds a lot of stuff so make sure to get help from others in your household.
We highly suggest getting some sturdy shelving units and plastic bins or baskets to keep your garage items organized!
Get ready to sort through all the items in your garage and make decisions on what you want to keep and donate.
Day 20: Car
Ah finally the last day! We’re going to wrap up our series by organizing your car!
It’s not a room in your home but it’s a place that you spend a lot of time in and you should feel comfortable in!
You can also take this time to clean, vacuum and fully sanitize your car!
Most people spend up to an hour in their cars every day, so it’s important that it’s kept tidy.
And that will be a wrap, friends! After following along with this guide for the last 20 days, your house should be looking ahhhmazing!
Thank you in advance for joining us in this series, we hope you have fun and that you have a peaceful house to come home to everyday at the end of this.
Regardless if you finish the series, only make it halfway, or this is the only post you read, please reach out to the Clutterless Home Solutions Team if you have any questions or would like extra assistance!
Talk Soon,
Clutterless Home Solutions