Day 20: Car

Hello, Organizing Warriors!

You have made it to the final day in our series How to Organize Your Entire Home in 20 Days! We have been working our way through your home and decluttering the mess along the way.

This process has taken 3 weeks to complete and I hope you see how your hard work has been worth it (drink a nice glass of wine tonight and take a load off to appreciate your handiwork!).

We hope that this 20 day overhaul has left you feeling so much better, not only about the clutter in your home, but the clutter in your mind.

We also know that right now we need happy and healthy distractions from the crazy world we’re living in.

For today’s project, your car! It may not be a room in your house, but it’s a space that you spend a lot of time in and should feel relaxed while you’re there — we know how the usual Denver traffic can be anything but relaxing, so make your car your own personal oasis!

As always, the first step in the organizing process is to pull everything out of your car. This means empty your glove box, your center console and anywhere else you’re storing things in your car (everything that can be pulled out, don’t try to pull the actual car apart!).

Your car is an easy place for things to accumulate when you’re busy, always on-the-go!

The next step, as always, is to categorize your items. When all the items are categorized into groups, it makes sorting through the items much easier.

After you have categorized everything, take a break from the items because it’s time to clean the car!

First, wipe surfaces like the dashboard, steering wheel, door handle and middle console with disinfecting wipes. Then, vacuum the seats and floor (front and back!) in the car. Once you’ve vacuumed, use a glass cleaner to wipe the inside of the windows.

Next, take the floor mats out and wash those as well. Finish up by hanging a new air freshener in your car so it smells as good as it looks! If you want something more natural, we also like to put a small Tupperware of baking soda with your favorite essential oil with holes punched in the lid to create a fresh, subtle scent.

It’s always best to clean during the organizing process because there is nothing occupying the space and preventing you from cleaning those hard to reach places.

Once the car is cleaned, it’s time to get back to the stuff that came out of your car. There are only 3 options to sort these items: keep, donate or trash.

Items that you want to keep should be things that serve your family a purpose and you definitely will be using in the future. These are things like your vehicle’s user manuals, car insurance verification, and pens.

You can also keep a few emergency items in a plastic ziplock baggie in the case you ever need to floss and brush your teeth after lunch with a friend!

Items that need to be donated are things that are still in good condition but no longer serve a purpose for your family. These are things like a GPS if you use your phone’s navigational system and CD’s if you only use your phone for music.

Items that are trash are things that don’t serve your family any further purpose and wouldn’t serve anyone else purpose either.

These are going to be things like stained or torn seat covers and broken car phone chargers. Trash that easily gets left behind in your car are empty bottles, receipts, leftover food items, empty shopping bags and gum wrappers.

If you are having difficulty deciding on what items should be kept or donated, ask yourself questions such as, when was the last time someone in my family used/wore this item? Does this item still serve its original purpose for me? How many of this one item do I have and is more than one really necessary? Would someone else better benefit from having this item than I would?

By asking yourself these questions about items you aren’t sure of, you are opening your mind and being honest with yourself about the needs of your family. Any items that you keep but you don’t need will continue to add to the clutter in your car for no reason!

By giving away these items, you are not only clearing the mess from your house, you are also allowing someone else to use these items that may need them more than you.

After you’ve made the decisions on what items will stay in your car, it’s time to start putting them back.

Put important papers and information (car insurance, user manuals and maps) in the glove compartment.

Place items that you use more commonly (pens, hand sanitizer, chapstick and sunglasses) in the middle console.

Check out these console organizers that prevent your items from becoming a cluttered mess while you’re driving. Put items that aren’t used often (disinfectant wipes, jumper cables, umbrella and flashlight) in a bin and place that in the back of your car.

Just like in your house, it’s important for all the items to have a specific spot to ensure you can find items when you need them and once you have used them, you can easily put the item back.

Once you have put the items back in your car, it’s time to take care of the leftover items. These are the items that were in your car at the start of the process but don’t actually belong there.

This could be things like children’s toys, books, clothing and kitchen utensils. Go ahead and now place those items in your home where they actually belong.

Take note of who in your family the stuff mainly belongs to and have a conversation with that person on the importance of putting things where they actually belong to ensure your car stays clean and organized even after today.

If the stuff is mainly yours, set rules for yourself about how long items can stay in your car. Strive to never leave kitchen dishes in your car and always toss out trash when you’re going in at the end of the day.

Now you get to enjoy your freshly cleaned and organized ride!

If you are still feeling overwhelmed by your car (or any other room in your house!), please reach out to the Clutterless Home Solutions Team. We would be glad to help you get back on track!

Talk soon,

Clutterless Home Solutions

Day 18: Cleaning Supplies

Hello, Organizing Warriors!

Welcome back to our How to Organize Your Entire House in 20 Days series!

Thus far, we have organized family common rooms, your children’s areas, guest spaces and your quarters, so today we are going to take a break from rooms and organize things. What things you may ask?

Cleaning supplies! Spring cleaning season is here and now is a great time to get those products organized and ready to use.

The first step to organizing your cleaning supplies is gathering all of them together in one room.

Often, different supplies are stored in different rooms so start off by getting together all of the cleaning supplies that are scattered around the house.

Check the bathrooms, under sinks, the laundry room, anywhere you have ever stored cleaning supplies, go there and start gathering everything together.

By pulling out and bringing together all of the cleaning supplies, you won’t have to keep bouncing from room to room during today’s process, risking getting off task.

Organizing is all about increased efficiency, after all!

The next step to organizing your cleaning supplies is to start categorizing everything into groups based on what the items are.

Make groups of hand soaps, dish detergents, toilet cleaners, degreasers, glass cleaners, wipes, disinfectant sprays, multipurpose sprays, air fresheners, tools (scrubs, gloves, aprons) and any other cleaning supplies you may keep on hand.

By grouping together like items, you will easily be able to see what you have, what you need and make it all easier to organize.

After you have categorized all of the cleaning supplies, go through all of it to see if anything can be disposed of.

Check expiration dates and throw away any products that have expired.

Ensure you’re disposing of products properly. If there are any cleaners that you bought, tried, and then didn’t like, toss it out too.

If you don’t want to just throw these cleaning supplies away, you can offer them your neighbors or your housekeeper!

Next, go through scrubs and rags to see if any of those are too worn and should be trashed as well. It’s not safe to keep products that are expired and there’s no point in keeping anything that you don’t use, so toss it out now! (You’ll always have more rags!)

Once you have gone through all of the cleaning supplies, the next step to the organizing process today is to clean the space. Wherever you pulled the cleaning supplies from, go back and wipe down the interior of the cabinet, or if you’re lucky enough to have a cleaning supplies cabinet, wipe down the shelves.

Throw away any trash that was left behind during the gathering stage. Wipe clean any shelves or cabinets the products came from.

Make sure to wipe any of the cleaning bottles that may have residue on the outside of them. It’s amazing what clean looking cleaning products will do for the aesthetic of the space!

Finish up by wiping any bins or baskets that you keep your cleaning supplies in.

After you have cleaned the spaces the cleaning supplies came from, the next step is to start putting the supplies away.

While you’re putting the supplies away, keep everything grouped together in the categories you previously sorted them. This will keep everything looking good, easy to find products when you need them and quicker to put products away when you are done using them.

Whether you store your cleaning supplies in the room you use them or all together in one space, it’s always a good idea to use bins to keep the products contained.

You can use small turntables to ensure items are always easily accessible.

If you store your cleaning supplies under a sink and the space is limited, check out these expandable under the sink storage racks that are great for keeping your products organized even when they are out of site.

It’s also smart to line the bottom of the cabinets or the shelves where your cleaning products are stored.

We love this one from Target!

Finish up by labeling any bins or baskets that you used to so there are never any questions where an item belongs!

The last thing you want to think about when you are trying to clean a mess in your home is where are your cleaning supplies hiding.

Cleaning is never anyone’s favorite task so don’t make it even more dreadful by letting your cleaning supply storage get out of hand.

If you’re still feeling overwhelmed by today’s process, please reach out to the Clutterless Home Solutions Team.

Talk soon,

Clutterless Home Solutions
Day 17: Linen Closet

Hello, friends! Welcome back to Day 17 of How to Organize Your Entire Home in 20 Days!

We are so close to being finished with getting your house in order, just a few more short days and you will have reached your goal!

For Day 17, we are going to organize your linen closet.

**Bonus tip: The best way to make your linen closet looking nice is to have the “fat fold” facing out. Watch this video to see what we mean. This means that the thickest part of the sheet should be facing out. This creates a nice, uniform look!

This is one of the closets we tend to shut the door on to try to forget the mess isn’t there.

Today’s process will be quick and easy though, plus the end result will be so worth it!

If your linen closet is part of your laundry room, check out Day 16 for a full guide to organizing that room.

The first step to organizing your linen closet is to pull out all of the items in the closet and make a pile of them on the floor.

Start pulling out all of the sheets, blankets, towels, back stock items, anything that is in the space. Leave nothing behind in the closet.

By pulling out everything in the linen closet, you will be able to see which items actually belong in there and which items got thrown in there and are just adding to the disorganization.

Once you have pulled everything out of the space, start categorizing all of the items.

This means grouping together all of the like items — the more defined you can make your groups, the better your linen closet will look at the end of the process.

Make groups of matching sheets, extra pillow cases comforters, throw blankets, back stock items (can we say Costco?!), towels, toilet paper, extra toiletries and anything else you may store in your linen closet.

Once you have made those broad groups, further categorize them by the size of each of the items (king size sheets, queen size sheets, adult towels, children towels).

By categorizing all of the items in your linen closet, you will easily be able to put the items back in an organized way and make it easier to find things in the future.

After you have pulled everything out and categorized your items, the next thing to do is to throw away any trash that you see.

Trash that easily accumulates in this closet are old boxes and random pieces of paper and plastic.

After you have categorized everything from your linen closet, the next step in the organizing process is to clean the shelves!

Start by dusting and wiping clean all of the shelves. Once you have done that, vacuum/sweep the floor.

Finish up by placing an air freshener in the closet so the items stored in there smell fresh when you go to use them.

It’s always best to clean the space in the middle of the organizing process when all of the items are out of the space so you can clean in those hard to reach spots.

Once you have cleaned the linen closet, it’s time to get back to all of the items in the floor.

There are only 3 options to all of these items: keep, donate or trash.

Items that you want to keep should be things that serve a purpose for your family and will definitely be used in the future.

These are things like sheets, comforters, and toiletries that your family still uses.

Items that need to be donated are things that are still in good condition but no longer serve a purpose for your family.

These are things like sheets and comforters that your family has outgrown, sheets and comforters that don’t fit any current beds that you have, items that you have an excess of and items (excluding back stock items) that you haven’t used in the last 6 months.

Depending on how organized you want to be, you can also donate any non-matching sheets you may have, or create a section for the non-matching sheets so you always have back-ups when your friends or family visit.

Items that are trash are things that don’t have any further purpose for your family and wouldn’t serve anyone else purpose either.

These are going to be things like ripped or stained sheets, pillowcases, comforters and empty bathroom products — this is also a good time to fill up your daily use toiletries from this back stock area!

If you are having difficulty deciding on what items should be kept or donated, ask yourself questions such as, when was the last time someone in my family used/wore this item? Does this item still serve its original purpose for me? How many of this one item do I have and is more than one really necessary? Would someone else better benefit from having this item than I would?

By asking yourself these questions about items you aren’t sure of, you are opening your mind and being honest with yourself about the needs of your family. Any items that you keep but you don’t need will continue to add to the clutter around your house for no reason.

By giving away these items, you are not only clearing the mess from your house, you are also allowing someone else to use these items that may need them more than you.

Once you have decided on which items you will be keeping, it’s time to put those things back into your linen closet.

While you are putting away the items, keep them grouped together by the categories you previously sorted them in.

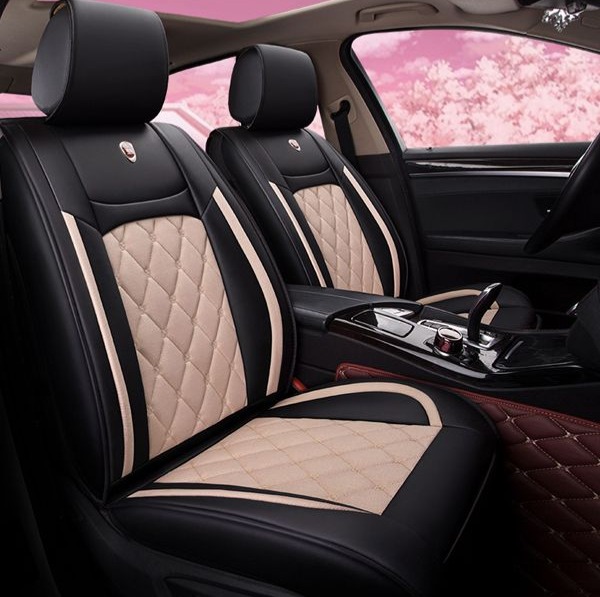
Store your comforters and throw blankets on the top shelf since those items are the least commonly used items.

Next, store your sheets on the shelf under the blankets. Check out our video on how to neatly fold those pesky fitted sheets.

Baskets are great for storing away linens and blankets because they prevent them from falling on top of each other and makes it easier to find them in the future.

You can even have different baskets for different sheet sizes.

Once the sheets are back in, store away the towels on the shelf below that (make sure your children can still reach them!).

Lastly, put away all of your toiletries, toilet paper, and other back stock items. Keep all of your products grouped in their categories and store them in bins to keep them contained and organized. Finish up by adding labels to any bins that you used.

If you didn’t utilize bins, you can still add labels to the shelves to ensure everything stays in its place (and everyone knows where to put it back!).

Finish up by taking care of any leftover items.

These are going to be the items that were in your linen closet at the beginning of today’s process but don’t actually belong there.

Take the time now to find where these items truly belong.

Don’t let your linen closet turn into your dreaded nightmare. With just a few steps, you can get it back to being easy to find all of your stuff and looking great.

If you are still feeling overwhelmed and would like help with organizing your linen closet (or any room!), please reach out to the Clutterless Home Solutions Team.

Talk soon,

Clutterless Home Solutions

Day 16: Laundry Room

Hello, friends!

Welcome back to our How to Organize Your Entire Home in 20 Days series.

We have worked our way through the shared rooms of your house, the bathrooms, the bedrooms and the closets.

Now you’re asking yourself, what else is there to organize?

Don’t you worry though, we still have some rooms planned for you! Today we’re going to focus on the laundry room.

This is the dreaded, cluttered room that we pass through on a daily basis and leave a trail of mess as we go.

It’s easy to shut the doors and pretend the mess isn’t there, but it still is, and today we’re going to face it head on.

We don’t want to push the clutter behind a door because it’ll always be in your mind and causing you anxiety! Clutter really affects your mental health as well as your relationships. We talk about this more in our blog The Duty to Declutter: Why Clutter is Effectively Ruining Your Life.

If your laundry room doubles as your linen closet, be sure to check out Day 17 tomorrow to apply those same steps to your laundry room.

Typically, the first step in the organization process is to pull everything out. Today, the first step is going to start with gathering ALL your dirty laundry throughout the house.

**Bonus Tip! For those of you who have lots of kiddos in the house (husbands included! 😉), we like to make a basket for each person. That way, when you pull out the dry clothes, you can simply throw each person’s clothes in their basket and they can take care of the rest.

This is perfect because it takes some of the load off of you, AND it teaches your kids responsibility!

Go ahead and start a load now and all through today’s process, keep cycling through the dirty laundry until it’s finished.

Once you’ve started a load of laundry, pull everything out of the space and put the items in categorized piles in different areas nearby.

Start bringing out the detergents, fabric softeners, and dryer sheets.

By bringing out everything from the space, you will be able to see which items actually belong in the room and which items have found their way in there but shouldn’t be residing there.

To start categorizing, put laundry detergent with the other laundry detergents, the fabric softeners with the other fabric softeners, dryer sheets with other dryer sheets and so on until everything is in a group with similar items.

By grouping together similar items, you will be able to see everything you have on hand. This will help you better organize and take inventory of all the products you have.

Hint! This helps you save money!

Once you have categorized all of the items, the next step in today’s process is to clean the laundry room.

You want to make sure the laundry room is already clean since that’s where you take your clothes to be cleaned!

Start by dusting off high to reach areas and wiping clean any other shelves, counters, or bins.

Next, wipe clean the exterior of the washer and dryer. Watch this video to see how to clean the inside of the washer and dryer. If there is a sink or any windows, clean those now as well.

After that, replace the trash bag in the trash can (if your laundry room doesn’t have a trash can, it definitely should!).

Finish up by sweeping/vacuuming/mopping the floor.

Now let’s get back to all of the stuff. There are only 3 options to all of these items: keep, donate or trash.

Items that you want to keep should be things that serve your family a purpose and you definitely will be using in the future.

These are things like irons, ironing boards and cleaning supplies.

Items that need to be donated are things that are still in good condition but no longer serve a purpose for your family.

These are things like clothing that is sitting in your laundry room because no one wears it anymore, tools that you no longer use or if you have multiples of an item and only one is necessary.

Items that are trash are things that don’t serve your family any further purpose and wouldn’t serve anyone else purpose either.

These are going to be anything that is broken, torn or stained.

Trash that easily accumulates in the laundry room are empty detergent bottles and dryer sheet boxes.

If you are having difficulty deciding on what items should be kept or donated, ask yourself questions such as, when was the last time someone in my family used/wore this item? Does this item still serve its original purpose for me? How many of this one item do I have and is more than one really necessary? Would someone else better benefit from having this item than I would?

By asking yourself these questions about items you aren’t sure of, you are opening your mind and being honest with yourself about the needs of your family.

Any items that you keep but you don’t need will continue to add to the clutter around your house for no reason.

By giving away these items, you are not only clearing the mess from your house, you are also allowing someone else to use these items that may need them more than you.

After you have decided on which items you are keeping, it’s time to start putting back all of the items.

Put the items away by the categories you recently sorted them in.

By keeping all of the items together in their groups, it will be easier to find things when they are needed and easier to put things away in the right spot once you’re done using them.

Baskets are great to use in laundry rooms to keep all of the items contained and organized, plus they look super cute!

We often use Y-Bins from Target. They’re plastic, durable, and they look great!

If you are limited on storage space in your laundry room, these carts are great for adding extra space and easy to move around as needed.

Don’t forget to use labels whenever possible to ensure everything continues to stay organized.

Finish up by displaying decorations (fake plants look great in laundry rooms!) in the areas of the laundry room that look empty.

By filling empty surfaces with decor, you will be less compelled to start stacking clothing clutter there.

When all of the items are put back in their spot, it’s now time to take care of any leftover items that are still sitting on the laundry room floor.

These are the items that were in the room at the start of today’s process but don’t actually belong there.

This could be sports equipment, toys, electronics, anything that someone brought into the laundry room and left there.

These things continue to add to the clutter of your laundry room and need to be put away in their correct spot within the home!

Take note of who in your family the stuff mainly belongs to and have a conversation with that person on the importance of putting things where they actually belong.

If it’s not a matter of who it all belongs to, rather than what it all is (extra food, tools, household supplies), consider adding a shelf in the laundry room to permanently store those products so they have a designated spot and are easier to keep organized — but make sure there isn’t a home for these items elsewhere!

Once everything is put away, let’s get back to the laundry that you’ve been cycling through.

Check out this video on how to file fold clothes so they are easy to find, stay organized and you have more space in your dresser drawers.

It’s best to fold clothing as soon as it comes out of the laundry so wrinkles don’t develop and your laundry doesn’t become clutter all around your home.

However, life can get busy and that’s not always possible. Set rules with yourself for when clean clothes need to be folded and put away by.

You can also impose these guidelines on your kids when it comes to their laundry baskets! Incorporate folding and hanging their clothes into their weekly chores early on (I started doing my own laundry when I was 9!).

The more you can include your family in the laundry process, the better!

Dirty laundry can easily start to feel overwhelming so don’t forget to ask for help when you need it.

Designate certain days of the week for certain loads of laundry and see the cycle (wash, dry, put away) all the way through on those days.

Having a laundry schedule throughout the week will cut back from having to play catch up at the end of the week and having to spend an entire day doing so.

If you are still feeling overwhelmed by your laundry room, please reach out to the Clutterless Home Solutions Team, we would be glad to help you get back on track!

Talk soon,

Clutterless Home Solutions
Day 15: Office

Hello, friends! Welcome back to our How to Organize Your Home in 20 Days series!

You have worked so hard organizing your home and it definitely shows.

I hope you are starting to feel more at ease as you are clearing your home of clutter. Today’s project… the office!

The office in your house is shared by many people for a lot of reasons. It’s an easy dumping ground for miscellaneous items and the never ending stack of papers.

Today we are going to clear out that office so you have a peaceful place to work. Let’s get started!

In this particular project, we helped our client get rid of 90% of the paper she and her husband had been accumulating over 30-40 years.

We donated 5 filing cabinets. At the end of the project, our client was able to keep all her important paperwork in the built-in filing cabinet in her desk!

First step of organizing your office — start putting everything in your office in a pile in the middle of the room.

Bring out all of the books, papers, knick-knacks, small office supplies (stapler, tape, thumbtacks) and large office supplies (printer, desktop monitor, keyboard).

The large office supplies are fine to stay on a flat surface, you don’t have to put those on the floor!

By bringing out all of the items from their spaces, you will be able to see which items in your office actually belong there and which items are just adding to the clutter.

As you’re pulling things off the shelves and out of cabinets, categorize everything into groups, putting all of the like items into groups.

We like to categorize things AS we pull them out to keep things efficient and to make sure the piles don’t become overwhelming.

Group together all of the books, all of the papers, all of the folders, all of the charger cords, all of the pens, and so on until everything is in a group with like items.

By putting everything into groups, you will easily be able to see the items you really need, items you have too many of, and items you didn’t even know you had!

Before we start to clean your office, we need to dive more into the paper situation.

If you really want to declutter and organize your office as a long term solution, you need to sort through all of the papers scattered about.

Paper contributes to the most clutter in an office, so it’s important we take time now to deal with it.

Sort all of the paper into categories based on short-term needs (coupons, information flyers), action items (bills, invitations to events), long term filing (birth certificates, passports), leisure (magazines, newspapers) or recycle (junk mail or anything you no longer need from the previous categories).

In this example, we put all the file tabs on one side. I’ve found that this is efficient for people who don’t have a lot of tabs. It’s also more efficient when all the tabs are in a row. If you add more folders and tabs, you can add it in without changing all the other tabs!

Put short-term papers in a spot where you can easily locate and use them in the future. Store action items in a spot where you can see them frequently and take care of them.

If possible, opt out of paper billing when you are able to, many billing companies give you a discount when you make the switch!

Invest in a filing storage for long term filing so important documents are safely tucked away and you know where to locate them.

**Bonus Tip! Don’t get a large filing cabinet unless you have a lot of important paper to keep archived. As is with every space in the house, if you have storage space, you WILL fill it.

Place leisure paper in an area of your home where you will read through them in your free time.

For papers that are trash, throw them away immediately so they don’t start to pile up again.

It’s good to have a recycle box and a shred box so you can easily take these things to the car or the recycling bin once you’re done sorting the paper.

Investing in a shredder will also help you get rid of papers quickly because you won’t have any apprehension about throwing away mail that may potentially have sensitive information on it, therefore, never having to hold on to papers that you don’t need.

However, shredding can take a ton of time if you have a lot of accumulation. We like to take our bulk shredding to Pro-Shred in Englewood. They have some of the best prices in town if you’re happy with drop-off shredding.

After all of the items in your office are categorized, it’s time to clean it!

Start off cleaning by dusting all the high surfaces and then wiping down all other flat surfaces. Polish any knick-knacks and decorations.

Disinfect the commonly touched surfaces and items. Replace the trash bag in the trash can. Finish up by vacuuming/sweeping the floor.

Once you are finished cleaning the office, it’s time to get back to all the items on the floor.

There are only 3 options to all of these items: keep, donate, or trash.

Items that you want to keep should be things that serve your family a purpose and you definitely will be using in the future.

These are things like books, electronic devices you use, office supplies, important papers, memorabilia and current decorations.

Items that need to be donated are things that are still in good condition but no longer serve a purpose for your family.

These are things like old decorations, items you have an excess of, electronics you no longer use and books no one in your family will read in the future.

Items that are trash are things that don’t serve your family any further purpose and wouldn’t serve anyone else purpose either.

These are going to be things like expired batteries, charger cords that have no host, a stack of old newspapers and broken electronics.

If you are having difficulty deciding on what items should be kept or donated, ask yourself questions such as, when was the last time someone in my family used/wore this item? Does this item still serve its original purpose for me? How many of this one item do I have and is more than one really necessary? Would someone else better benefit from having this item than I would?

By asking yourself these questions about items you aren’t sure of, you are opening your mind and being honest with yourself about the needs of your family. Any items that you keep but you don’t need will continue to add to the clutter around your house for no reason.

By giving away these items, you are not only clearing the mess from your house, you are also allowing someone else to use these items that may need them more than you.

Once you have made the decisions on what items you will be keeping, it’s time to put those items away in your office.

Start by placing the books on shelves based on genres (or if you’re feeling really ~crazy~ you can sort them by color for an amazing aesthetic).

Then, move onto placing commonly used items on the top of your desk for easy access.

Put less commonly used items in the drawers of your desk so they are tucked away and not adding clutter to your work space.

Use organizers to keep everything on and in your desk organized and in a designated spot.

Designate a spot in the room for your new paper sorting system so paper doesn’t get too overwhelming again.

Finish up by putting out all of your knick-knacks and decorations back out on display.

After you have put everything back in its place, finish up today’s process by putting away any leftover items.

These are the items that were in your office at the start of today but don’t actually belong there.

Take note of who in your family the stuff belongs to and have a conversation with them about the importance of returning their items to where they actually belong within the house and why putting things in the right spot is important to you.

Your office should be a place that is functional for your family and peaceful to be in. It’s where important work is done, not where you have to stress about finding something.

If you are still feeling overwhelmed by the items in your office, please reach out to the Clutterless Home Solutions Team.

Talk soon,

Clutterless Home Solutions
Day 14: Master Bedroom

Welcome back to Organizing Your Entire Home in 20 Days!

You have officially made it to day 14!

For today’s organizing, we’re going to focus on your bedroom!

Since we have already tackled the biggest clutter monster in your room (your clothes), today will be a breeze!

This is another great day to have your partner work alongside you to build an organizing system that works best for both of you, making the upkeep of today’s organization much easier going forward.

Every person will be different, but this is where you and your partner need to communicate about how you both feel about the clutter and how you will both put effort towards keeping up your organization!

This will not only make organization maintenance easier, but it will help your relationship with your partner!

The first step to organizing your bedroom is to pull out all of the items in the room and put them into a pile on the floor.

Bring out everything from the drawers, cabinets and off the shelves and start building that pile. This means everything!

As you pull things out, it’s efficient to categorize all of the items as you go.

This means grouping together all of the like items.

Make groups of all the books, hobby/extra curricular things, electronics, decorations, souvenirs, memorabilia, sport/workout gear and anything else you have stored away in your room.

The more specific and smaller you can make your groups, the better organized your room will be at the end of today’s process.

For example, if you have a “workout group” of items, then divide everything in it into individual groups of outdoor sports equipment, cardio equipment, and yoga equipment.

Another example would be a “books group,” those can then be further sorted by genre.

The same technique can be used for all of the broad groups you have categorized your items by.

Smaller categories will make your room easier to find things, quicker to put things away after use and overall better to function in.

By making groups of similar items, you will be able to easily see all of the items taking up residence in your bedroom and start thinking about which ones you could do without.

Remember this: you can’t organize clutter, so if you want your bedroom to truly be organized, you’re going to have to let go of some of the items that don’t use and things that don’t have special meaning to you.

This just looks stressful.

In order for this to happen, you have to go through all of the items in your room and make decisions about what you should keep and what you should get rid of, bringing everything out from it’s current spot in the room will help with that.

If your bedroom doubles as your office, check back soon for Day 15 when we organize the office and you can apply those same steps to the office equipment in your bedroom.

The next step to organizing your bedroom once you have categorized all of the items is to clean it!

Start by stripping the sheets and pillowcases from your bed, throwing them in the washer and replacing them with a fresh set.

Then, dust off high to reach places and wipe clean any other flat surfaces.

Take a moment and polish any knickknacks or decorations and wipe clean any mirrors or glass surfaces.

Don’t forget to disinfect commonly touched surfaces like light switches and doorknobs! After that, sweep/vacuum the floor.

Replace the trash bag in your trash can (if you don’t have one in your bedroom, you definitely should!). Finish up by lighting a candle to make the air smell as fresh as your room is about to be.

Cleaning and organizing work together to transform a room so you always want to take time to deep clean an area while you’re organizing it for best results.

It’s like when you have a new car — you’re more inclined to take care of it when it’s fresh and new!

Once you have cleaned your bedroom, it’s time to get back to all of that stuff. There are only 3 options to all of these items: keep, donate or trash.

Items that you want to keep should be things that serve a purpose for you and will definitely be used in the future.

These are things like books, office supplies, electronics, memorabilia, and current decorations.

Items that need to be donated are things that are still in good condition but no longer serve a purpose for you.

These are things like old decorations, hobbies that you no longer enjoy, items that you have an excess of and items that you haven’t used in at least 6 months.

Items that are trash are things that don’t serve you any further purpose and wouldn’t serve anyone else purpose either.

These are going to be things like expired batteries, broken electronics, chargers that don’t have a host or any other items that are broken or useless.

It’s easy to let stuff pile up during your day to day routine, so take time to clear those things out of the way.

If you are having difficulty deciding on what items should be kept or donated, ask yourself questions such as, when was the last time someone in my family used/wore this item? Does this item still serve its original purpose for me? How many of this one item do I have and is more than one really necessary? Would someone else better benefit from having this item than I would?

By asking yourself these questions about items you aren’t sure of, you are opening your mind and being honest with yourself about the needs of your family. Any items that you keep but you don’t need will continue to add to the clutter around your house for no reason.

By giving away these items, you are not only clearing the mess from your house, you are also allowing someone else to use these items that may need them more than you.

Once you have made the decisions on what you will be keeping and getting rid of, it’s time to put the items you’ll be keeping away.

Put everything away within the categories that you previously sorted them by.

Start by putting back all the books on their shelves by genre.

Once that is done, put away any of your hobby or extracurricular activity items.

If you have a lot of memorabilia items, store them neatly in a clear container and keep it in a less commonly used spot in the room.

You can also get cute “photo” boxes to store these items.

Place commonly used items in easy to reach places like on top of your dresser or nightstand, invest in a cute tray to keep everything contained and looking neat.

Put less commonly used items in drawers so they are tucked away and not adding unnecessary clutter to your room.

For the remaining items from your categorization step and other miscellaneous things, use cute baskets and labels to store everything out of site, then place them on shelves to keep the room looking tidy.

Finish up by displaying decorations and small knickknack items in the areas of your room that look empty.

By filling empty surfaces with decorations, you will be less compelled to start stacking clutter there.

They can house all kinds of different items and decorations that you keep in your room, while keeping everything in a designated spot and looking organized.

You can even get fabric cube inserts to keep the space looking even more tidy!

After you have put all of your items away, the last step to organizing your bedroom is to deal with all of the leftover items that are still in the pile on your floor.

These are the items that were in your room at the beginning of today but don’t actually belong there.

Take the time now to place those items where they actually do belong.

To prevent random stuff from ending up back in your room going forward, try to avoid bringing those items in in the first place or set rules for yourself to when those items need to be returned to their designated spot.

Out of all the rooms in your home, your bedroom should be the most peaceful and relaxing place to be in.

This is the place where you should be able to let your guard down and recharge. The lack of organization and clutter should be the last thing you should have to worry about when you’re there.

If you don’t feel this way while in your bedroom and would like help getting there, please reach out to the Clutterless Home Solutions Team.

Talk soon,

Clutterless Home Solutions
Day 13: Master Bathroom

Hello, all! Thank you for joining us for another fun day of organizing your home.

We have been on a journey of decluttering your house and I am so excited to have another day with you!

If you want to see the other blog posts in this series, you can visit our blog here.

Today we are going to continue with YOUR spaces and organize your bathroom. Are you ready!!

This is the kind of enthusiasm we always bring to an organizing project!

The first step to organizing your bathroom is to next step is to pull everything out. That means bringing out everything from the shower, cabinets, drawers and any other spaces that are in your bathroom.

Don’t be shy, bring it all out!

By pulling all of the items out from their spots, you’ll be able to see all of the items that occupy your bathroom and start making decisions on what can stay and what needs to go.

As you pull out all of the items in your bathroom, categorize them into groups based on what they are.

Put all of the products from your shower that are currently being used in a group together (shampoo, conditioner, soap, face wash, exfoliates).

Then move to the rest of your beauty products that are currently in use and categorize those as well.

Sort everything into a broad group and then break each broad group into smaller, more specific groups.

The more specific you can get for each group, the better your bathroom will look and function at the end.

Group all of the hair products together, then sort them by hairspray, heat protector, dry shampoo, accessories and tools.

Do the same for face products, then sort them by facial cleanser, serum, toner, moisturizer, wipes, makeup remover and masks.

Move onto sorting the body products, then grouping them by deodorant, lotions, sunscreen, oils and bath bombs.

Next up, group together feminine products, then sort them by tampons, liners, pads and wipes.

After that, round up all of the oral care, sort them by toothbrush, toothpaste, floss and mouthwash. Lastly, the body sprays, sort these by scent or by how often you use that specific perfume.

Then do the same with all of your makeup. Making groups of eye products, then sort them by mascara, eyeliner and eye pallets.

Then group together all of the products for your face and sort those into powders, bronzers, blushes, highlighters and foundation.

You can get these cute little pull out organizers on Amazon!

Next sort all of your lips products, then sort them by lipsticks, glosses, liners and chap sticks. Lastly group together all of your tools eyelash curlers, tweezers, sharpeners and nail clippers.

Finish up by doing the same with your paper products, grouping them by toilet paper, cotton swabs and cotton rounds.

After that, all of the linens, sorting them by body towels, hand towels and face clothes. Don’t forget to categorize your cleaning supplies!

Finish up by grouping together your back stock items, these are items that you have extra for when your currently being used products run out. Make groups for these products just as you have for all of the other items.

By grouping together similar items, you will easily be able to see all of the items that you are still using and the items that it’s time for you to get rid of.

Once all of the items are sorted into categories, now is the time to clean your bathroom.

Scrub inside (and out!) the shower, toilet, drawers, and cabinets.

Wipe on top of the bathroom counters and mirror.

Disinfect commonly touched surfaces like the door handles and the light switches.

Put any rugs or hand towels in the washer so those can get cleaned as well.

Finish up with lighting a candle (or turning on the electric candle warmer) to spruce up the scent in the room.

Now is the best time to clean the bathroom since there are no products or items getting in the way of those hard to reach places.

After you are finished cleaning the bathroom, it’s time to get back to all of the products sitting on your bathroom floor.

All of the items need to be kept, donated, or thrown away.

Items that you want to keep in the bathroom are products that are currently being used or will be used once the current items are gone.

Items that need to be donated are items that you bought, never opened, and will not be using in the future (things such as, items you don’t like the scent of, items that you bought the wrong brand, products that were gifts but you will never use, wrong shades of makeup).

Check with your local donation center that they will accept unopened hygiene products!

Items that are trash are products that have expired and products that you have opened but won’t be using in the future.

With so many different products that are filling up your shelves, now is a great time to check expiration dates to make sure the products you are using are still safe for you.

Once you have made the decisions on the products you are keeping, let’s start putting them away.

As you’re putting all of the items back, remember to keep them in the categories that you sorted them in previously, that way they continue being easy to find. First, put your already opened shower items back into the shower.

Then, put your already opened daily routine products on your bathroom counter.

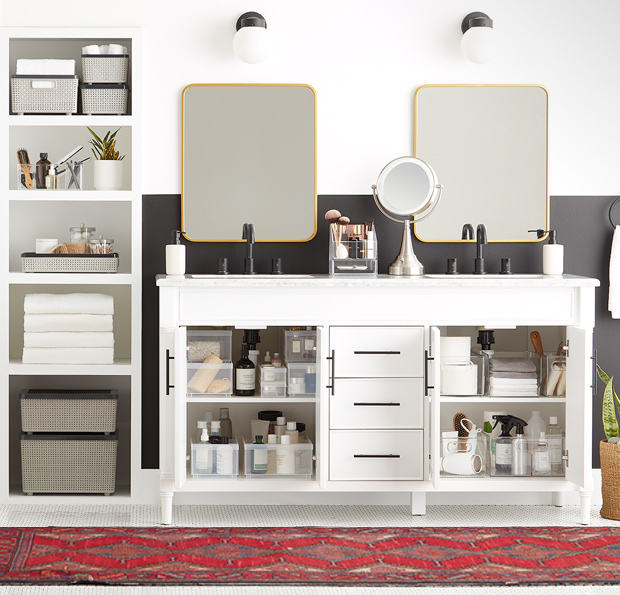
Use cute trays to contain the items so they are kept organized and stay looking neat. We always love getting these at Target. You can also use Amazon!

For items that you don’t use as often, store away in drawers. We always like these Sterilite pull out drawers. You can get them online, at Target and Walmart!

Now let’s move onto your makeup. Do you have an organizer to store your makeup in?

If yes, perfect! Put your products back based on their categories.

If no, now would be a good time to invest in one.

If you don’t have a specific spot for your makeup, it will continue to be cluttered up on your bathroom counter.

For some of us who are lucky enough to have a makeup vanity, organize this area now if you didn’t already do it yesterday when we did the Master Bedroom.

Next up, time to put away your linens.

Fold them nicely and store them in baskets.

Finish up by putting away back stock items, cleaning supplies, feminine products, and paper products in the cabinets.

Again, use and label bins to ensure all of the different items are kept in their groups and looking good.

If the space under you sink is limited, check out these expandable under the sink storage racks that are great for keeping your products organized even when they are out of site.

It may seem excessive to have a variety of baskets, bins, and organizers, but in order for all of your products to stay organized, everything needs to have a “home.”

By having homes for all of your items, you will easily be able to keep everything organized and easy to find with little effort.

Once all of your products are back in their spot, let’s finish up by dealing with all of the leftover items.

These are the things that were in your bathroom at the beginning of the process but you didn’t put away because they don’t actually belong there.

Take the time now to place them where they actually go inside your home.

Lastly, sweep and mop the floor, lay the rugs back out, hang up the hand towels, and take out the trash. Ta-da! Your bathroom is officially organized!

Just like your closet, your bathroom should be a place in your home that you go into and feel ready to relax. This is where you prepare yourself for the day and transform yourself into who you want to be.

Here are more practical tips to decluttering your bathroom!

If you don’t feel this way when you’re getting ready for the day, please reach out to the Clutterless Home Solutions Team.

Talk soon,

Clutterless Home Solutions
Day 12: Dresser and Closet

Hello, friends! We are starting Day 12 of Organize Your Entire Home in 20 Days!”

So far we have moved through your kitchen, dining room, living room, and your children’s room, so now, we move into your room!

Today we will be organizing your dresser and your closet! I hope you’re ready to go through some clothing!

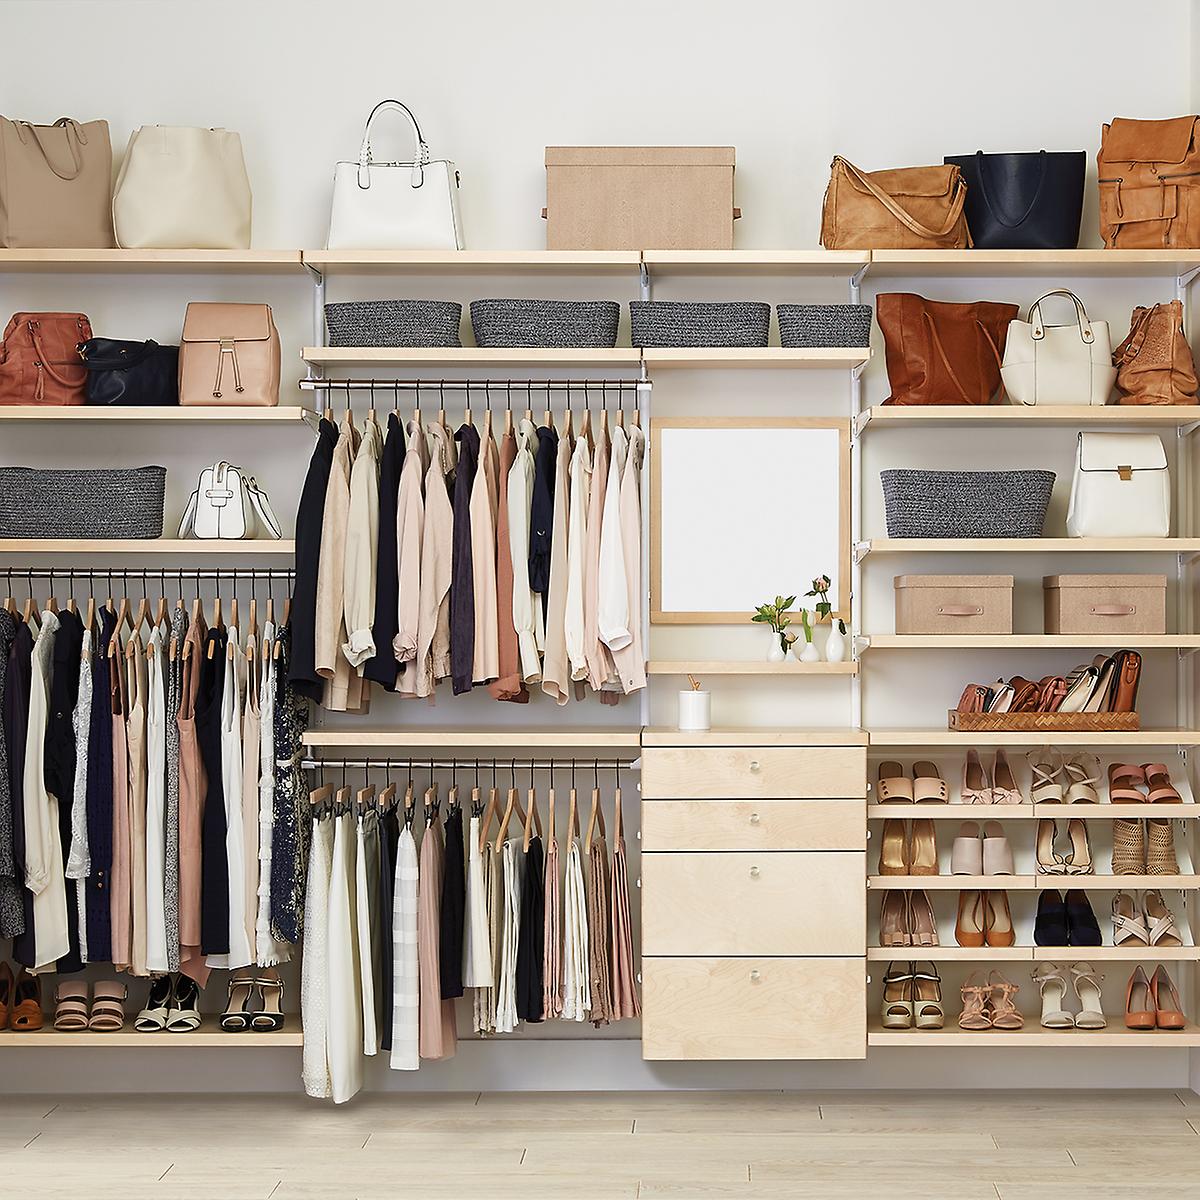
We’re going to take your closet from looking like the picture on the left to looking like the picture on the right!

Start by bringing all of the clothes out from their spots. Pull out all of the clothing items, shoes, bags/purses and accessories as well.

There should be nothing left in the dresser or closet after you have pulled everything out.

By bringing out all of the clothing, shoes, and accessories, you will be able to see all of the items that you own and will help make the next steps easier.

The next thing to do is start categorizing all of your items.

The more in depth you categorize, the better your dresser and closet will look at the end.

Start by sorting together all of the like items; clothes with clothes, shoes with shoes, hats with hats, scarves with scarves and so on until everything from your dresser and closet are in groups together.

Next, go a step further and start categorizing within the broad groups.

For clothing, put all of the different articles of clothing in groups with similar items, all the shirts with other shirts, all the shorts with other shorts, all the pants together, all the jackets together and so on until all of the different articles of clothing are grouped together.

After your clothing is sorted by what it is, sort them by occasion.

Put your nice blouses together, old T-shirts together, leggings together, slacks together, athletic shorts together, jean shorts together and so on until all of the items are in very specific groups.

Finish going through the clothes by going into each separate group and then sorting them by color and pattern.

This may seem tedious, but the end result will be so worth it!

Then, back to your shoes; start sorting those into groups based on what type of shoes they are. Put all of the sneakers together, sandals together, heels together, boots together and so on until all of the shoes are in groups.

Once the shoes are in their own groups, separate them by color too.

Keep doing that with all of the items that came out of the dresser and closet (hats, scarves, bags, jewelry, whatever you had in your closet) until everything is divided into very specific and detailed groups.

Once you have put everything into categories, its time to make decisions on the items. There are only three options to all of these items: keep, donate, or trash.

Things that you want to keep are those that you wear regularly, still fit, use often and serve a specific purpose for your wardrobe.

Items that needs to be donated are ones that you haven’t worn/used within the last 6 months, no longer fit, or that you have an excess of.

Things that is trash are items that are torn or have stains on them.

Many people believe the more clothing, shoes and accessories you have, the better. In reality though, the more items in your closet the more you’re going to feel cluttered and disorganized.

It’s not about the quantity of clothes that you own, it’s about the quality and function of them. You don’t need four different pairs of sneakers all in the same color. You want them.

By having unnecessary amounts of all of these items, you are continuing to add to the clutter.

If you are having difficulty deciding on what items should be kept or donated, ask yourself questions such as, when was the last time I wore/used this item? Does this item still fit the way it should on me? Do I enjoy this item when I’m wearing it? Does this item still serve its original purpose for me? How many of this one item do I have and is more than one really necessary? Would someone else better benefit from having this item than I would?

By asking yourself these questions about items you aren’t sure if you should get rid, you are opening your mind and being honest with yourself.

Any items that you keep but you don’t need, will continue to add to the clutter in your closet for no reason. By giving away these items you are not only clearing the mess from your closet, you are also allowing someone else to use these items that may need them more than you.

Once you made the decisions about all of the clothing, shoes and accessories, take a pause from it and focus on the dresser and closet themselves. It’s time to clean those spaces.

Starting in the dresser, wipe down the inside of the drawers and the outside surfaces as well. Then, move onto your closet. Dust/wipe all of the flat surfaces and vacuum the floor.

After you’ve cleaned the spaces, its time to start putting everything away. As you’re putting the clothing back, keep them in the same categories of occasion and color you previously sorted them in.

Start with the clothing that you want to hang in your closet. These should be articles of clothing that are nicer and can’t be folded (nice blouses, slacks, jeans, blazers, jackets).

Put the clothes that are worn more often in the most accessible place in your closet and store those less commonly worn items in the back.

If you have two levels of racks, hang your shirts and jackets on the top rack and pants on the bottom rack.

Pro tip: an easy way to make your closet look like the ones from Pinterest, invest in matching velvet hangers to step up your closet display. Having the same hangers throughout your closet will make it look so much more appealing to the eyes.

After you have finished hanging all of the clothes in the closet, move to the clothing that you want folded in your dresser. Designate one drawer for each of the categories you previously made.

Then, check out this video that will keep your clothes folded neatly in the drawers and easy to find. File folding, as shown in the video, is great for storing your clothing. This method makes it easier to see all of the items and then pull from the drawer without moving everything.

Once the clothes are put away, let’s move along to the shoes, bags and other accessories.

Store your shoes in a shoe organization of some type. If you don’t already have one, check out these ones.

Having a specific spot to keep your shoes will help keep them organized and from getting lost on the floor.

For larger bags and purses, stuff packing paper in them so they are displayed nicely and stay true to their shape.

Hang up scarves and belts so they are easy to see and easy to get to.

Use small bins to store beanie hats, ball caps, small hand clutches, robes or other items that wouldn’t fit in your dresser or closet. Designate one bin for each of those categories.

Place the bins on the shelf and label them!

If horizontal space is limited, don’t forget to take advantage of wall space! Hang nails for hats to rest on or hang shelves for clutches and purses.

By having a specific spot for all of the items in your closet, you will be able to find things faster and maintain the organization easier.

Remember this system doesn’t have to look like the closets you see on Pinterest, it just needs to work for you and make your life easier!

After you have all of your clothes, shoes and accessories put away, it’s time to deal with any items that are leftover. These are going to be any items that were in your dresser and closet at the beginning of today’s process but don’t actually belong there. Take the time now to place those items in your house where they really belong.

Your closet should be a place in your home that you step into and feel a sense of tranquility. It should be pleasing to look at, easy to navigate, and bring a sense of pride.

This is where you prepare yourself for the day and transform yourself into who you want to be, so make sure its a place you enjoy being in.

If you don’t feel this way when looking in your closet and would like help getting there, check out our other blog that talks about even more closet hacks.

Or please reach out to the Clutterless Home Solutions Team.

Talk soon,

Clutterless Home Solutions
Day 11: Guest Bedroom and Bathroom

Hello, friends! Welcome to Day 11 of our “Organize Your Entire Home in 20 Days” series! We are officially on the downhill slope of having your entire home nice and neat.

We’re going to change things up a little for today’s project, instead of focusing on one room, we’re going to tackle two in one day!

No worries, though! The two rooms we’re going to organize today are the guest bedroom and bathroom, two rooms that aren’t used too often and won’t take too much time to get them looking great.

Since a guest bedroom and bathroom are typically in close proximity to each other and don’t house a lot of items in them, we’re going to treat these two spaces as one room, just two different zones.

The first step to organizing is to gather all of the items in the room together.

That means anything and everything that is in a drawer, cabinet, dresser or closet, pull it out and gather it together in the middle of the bedroom.

Then, move to the bathroom and the do the same thing, bringing all of those items and combining them with the items in the bedroom.

By pulling everything out and gathering it into one area, you will easily be able to see everything that is occupying the room and determine what actually belongs there and what is unnecessary clutter.

Once you have gathered all of the items into the center of the room, start categorizing them into groups based on what the items are.

Put all of the decorations together, the clothes together, personal hygiene products together, cleaning supplies together and so on until everything that you pulled out in the last step, is in a group with similar items.

By grouping together like items, you will be able to make decisions on the items that you want to keep and the items you want to get rid of.

Because up next, it’s time to start making those decisions. The decisions are to either keep, donate or trash everything.

Items that you want to keep should be things that serve your family a purpose and you definitely will be using in the future. These are things like current decorations, seasonal items that you store in this bedroom, and clothes that your family still wears.

Items that need to be donated are things that are still in good condition but no longer serve a purpose for your family. These are things like old decorations, items that you have an excess of, and clothing that no longer fits anyone in your family.

Items that are trash are things that don’t serve your family any further purpose and wouldn’t serve anyone else purpose either. These are going to be things like burned candles, clothing that is torn or stained, a stack of old newspapers, or any other item that you were holding onto that won’t serve anyone a purpose.

If you are having difficulty deciding on what items should be kept or donated, ask yourself questions such as, when was the last time someone in my family used/wore this item? Does this item still serve its original purpose for me? How many of this one item do I have and is more than one really necessary? Would someone else better benefit from having this item than I would?

By asking yourself these questions about items you aren’t sure if you should get rid, you are opening your mind and being honest with yourself about the needs of your family.

Any items that you keep but you don’t need, will continue to add to the clutter around your house for no reason. By giving away these items you are not only clearing the mess from your house, you are also allowing someone else to use these items that may need them more than you.

After that, it’s time to clean the two rooms!

Starting in the bathroom, scrub inside and out of the shower, toilet, drawers and cabinets. Wipe on top of the bathroom counters and mirror. Disinfect commonly touched surfaces like the door handles and the light switches.

Add any trash that was in there to the trash that you have been accumulating from the beginning. Finish up by sweeping/mopping the floor.

After the bathroom has been cleaned, it’s time to move into the bedroom for cleaning. Dust and wipe off any flat surfaces, clean any mirrors and polish any decorations or knick-knacks that were being displayed.

Strip the sheets and pillowcases from the bed to wash and in addition, wash any throw blankets and rugs (wash the hand towel and rugs from the guest bathroom as well!). Finish the cleaning by sweeping/vacuuming the floor.

After the two rooms have been cleaned, its time to contain and put away the items.

Using bins to contain the items will help ensure the bathroom stays organized past today. This creates “homes” for everything.

Another way to help the bathroom stay organized is placing the items into the bins based on the categories that you previously sorted them in.

These bins are great for storing larger items in cabinets. Back stock products like shampoo, conditioner, face care and soap can be placed in these bins and stored away nicely.

For smaller items that are stored in drawers, these bins are great for keeping everything organized when not being used.

Finish up in the bathroom by labeling any bins you used!

Then move back to the bedroom and start putting away the items in there.

Guest bedrooms are typically used for overflow storage for homeowners so you want to make sure anything being kept in there is nicely organized so guests don’t feel overwhelmed by your stuff when staying at your house.

Which is why using bins and labels for everything in this room is so important. Not only will you be able to easily find things when you need them, you’re guests won’t feel like they’re sleeping in your dump zone.

These large storage containers are perfect for storing away clothing, seasonal items, decorations and sports gear when not in use. They take any closet storage from drab to fab!

Finish up in the bedroom by labeling any bins you used and making the bed with a fresh pair of sheets and pillowcases.

The last step in the organizing process, is to deal with the leftover items in the guest bedroom. These are all of the items that were in the two rooms at the beginning of today’s process, didn’t get put away because they don’t actually belong here, and need to be put away now. Take these items to whichever room they belong to.

You want the guest bedroom and bathroom to be a place that is up to date in organizing and cleaning for any potential guest.

The last thing you want to worry about when you’re having family over for the weekend is getting their room cleaned and ready to go, take care of it today and then you don’t have to worry about it later!

If you are still feeling swamped with the organizing or would like extra help, please reach out to the Clutterless Home Solutions Team.

Talk soon,

Clutterless Home Solutions
Day 10: Kids Bathroom

Hello and welcome to Day 10! You are halfway done with organizing your entire home! I hope you’re feeling as good as your house looks!

For Day 10, we are going to continue with your kid’s spaces and up today, their bathroom!

It’s another great day to get your children involved so they can start to build good organizing habits with you.

The first step in the organization process is to gather all of the items from inside the bathroom and put them in the middle of the bathroom floor (lay a towel on the bathroom floor for the stuff to sit on!).

Start pulling everything out from inside the shower, all of the products from inside the cabinets and drawers, all of the toys and towels, and gathering any other items laying around in the bathroom and set them on the towel in the floor.

By bringing out all of the items, you will be able to see what items actually belong in the bathroom and what items are just adding to the clutter.

After all of the items in the bathroom are gathered together in the center of the room, start categorizing them into groups based on what the items are.

Put all of the shampoos, conditioners and soaps that are currently being used in a group together, all of the back stock items in their own separate piles, all of the toys together, all of the cleaning supplies together and so on until everything is grouped together.

By grouping all of the similar items with one another, you will easily be able to see all of the items that will either need to be kept, donated or trashed.

As you’re categorizing everything into groups, throw away any trash as you go. Trash to be on the lookout for is things like empty shampoo and soap bottles, old toothbrushes, or empty random boxes.

Next, make decisions on all of the items. Everything either needs to be kept, donated or thrown away.

Items that you want to keep in the bathroom are products that are currently being used or will be used once the current items are gone (shampoo, soap, toothpaste, deodorant, cleaning supplies, etc.).

Items that need to be donated are items that you bought, never opened, and will not be using in the future (things such as, items you don’t like the scent of, items that you bought the wrong brand, products that were gifts but you will never use, etc.).

Check with your local donation center that they will accept unopened hygiene products!

Items that are trash are products that have expired and products that you have opened but won’t be using in the future.

After you have made decisions on all of the items, its time to clean the bathroom.

Scrub inside (and out!) the shower, toilet, drawers and cabinets. Wipe down the top of the bathroom counters and mirror. Disinfect commonly touched surfaces like the door handles and the light switches.

Next, put any hand towels or bathroom rugs in the washer so those can get cleaned as well. Finish up by lighting a candle (or turning on the electric candle warmer) to spruce up the scent in the bathroom.

Once you have decided what you are keeping, donating and trashing, it’s time to start putting all of the items back.

Start by placing the already opened products and toys back into the shower. Use toy organizers in the bathtub to keep all of the toys in place!

When placing items back in their spots, be sure to keep everything in the categories you previously sorted them in.

The best way to ensure this space stays organized past today is to use bins to contain the items. This creates “homes” for everything and helps keep everything in its spot.

Put the unopened back stock items, cleaning supplies, and other items that aren’t commonly used, in the bathroom cabinet.

If the space under you sink is limited, check out these expandable under the sink storage racks that are great for keeping your products organized even when they are out of site.

Next, place all of the more commonly used items (hair brushes, cotton swabs, deodorants, hand towels, face care products, etc.) in the drawers so they are easy to get to for you children.

These cute drawer dividers are great for keeping those small items in drawers organized and easy to find, plus they come in a variety of different sizes!

To finish up, put toothbrushes back in their holder, towels where they belong, and any remaining items back in their spots.

Label any bins that you used! This will help your children see where everything needs to go.

If you haven’t done so already, place a clothes hamper in the children’s bathroom so they have a place to put their dirty clothes and don’t just throw them on the floor.

To ensure your children’s bathroom stays clutter free, create an organizing system that works best for them and they will easily be able to follow.

Having these “homes” for all of their items, will help guide them where to leave their stuff even when you’re not around to help remind them.

After you have put all of the items that belong in the bathroom back, now is the time to deal with the leftover items that were in the bathroom at the beginning of the process but don’t actually belong there.

Once you have returned those items to their designated spots in your home, finish up by sweeping/mopping the floor and taking out the trash.

Your children’s bathroom can be a place that easily gets messy when kids are running in and out of it all day, but with these tips, it can easily be a mess free zone.

If you still feel like you may need help organizing this space (or any space in your house!), please reach out to the Clutterless Home Solutions Team for help.

Talk soon,

Clutterless Home Solutions